NITRO CDN Update
Applies To: SharePoint Online
Overview
For more info on this update, see the FAQ page here: FAQ Page
You can watch a video of this process here: Update Webinar Recording
CDN stands for Content Delivery Network. It is a network of servers distributed across various locations worldwide to deliver content (such as websites, images, videos, or other assets) to users more quickly and reliably.
When a user accesses content from a website using a CDN, the content is delivered from the server closest to the user’s location, reducing latency and improving loading speed. CDNs also help with load balancing, scalability, and protection against traffic spikes or Distributed Denial of Service (DDoS) attacks.
Migration to the New Crow Canyon NITRO Studio CDN
Crow Canyon NITRO Studio relies on a Content Delivery Network (CDN) to deliver resources efficiently and ensure optimal performance. The CDN used by NITRO Studio earlier (crowcanyon.azureedge.net), was retired on January 15, 2025. More information on this is available here. NITRO Studio has now moved to a new CDN (cdn.crowcanyon.com). To avoid service disruptions due to shutting down of old CDN, you must update NITRO Studio in your site collections. The update process will move the NITRO Studio code to use new CDN. There is no functionality change associated with this update; same content will be delivered from a different CDN.
This article provides step-by-step guidance on how to update NITRO Studio for your SharePoint sites.
Steps required to update NITRO Studio
- Review permissions and identify users who will run the NITRO Studio update.
- Get the list of site collections where NITRO Studio is installed.
- Update NITRO Studio components in each of the site collections.
- Update NITRO Studio in the NITRO activated sites:
- Update all sites in the site collection in one go
- Update sites one by one
- Repeat steps 1-4 for all other Site Collections you have.
By following the outlined steps, you can ensure a smooth transition to the new CDN and maintain uninterrupted access to NITRO Studio’s features and functionality.
Detailed Steps
NOTE: These Bold Red Steps 1, 2 & 4 below will be needed for EVERY Site Collection.
Step 1: Review Permissions and Identify Users Responsible for Running the NITRO Studio Update
The table provides a summary of the different user roles and their corresponding access levels to site collections within the NITRO Admin page in Crow Canyon.
| Role | Access to Site Collection from NITRO Admin Page |
| Site Collection Administrator (SCA) | Can access the NITRO Admin page and view all site collections with NITRO activated. |
| Tenant Administrator (Not SCA) | Cannot access specific site collections unless they are also a Site Collection Administrator. |
| Other Users (Non-SCA/Non-Tenant Admin) | Cannot access the NITRO Admin page or site collections unless explicitly granted access to the site collection. |
| Site Owner | Cannot view NITRO admin page for the site collection. Site Owners can access the NITRO site page of the respective site. Site Owner can manage and update NITRO for their specific site. |
To identify the Site Collection Administrator (SCA), check the SharePoint Admin Center or access a page within the site collection, such as the Site Admin Page.
To identify the Site Collection Administrator (SCA), follow these steps:
- Open any page on the SharePoint Site and click into the URL bar for your browser
- The URL will follow this pattern:
https://<Your Domain>.sharepoint.com/sites/<Site or Site Collection Name>/<other information that is not needed> - Replace this section of the URL:
/<other information that is not needed>
with this text:
/_layouts/15/user.aspx - Your URL should now look like this:
https://<Your Domain>.sharepoint.com/sites/<Site or Site Collection Name>/_layouts/15/user.aspx - Go to that URL, this is the Site Permissions page for the top level site in your site collection.
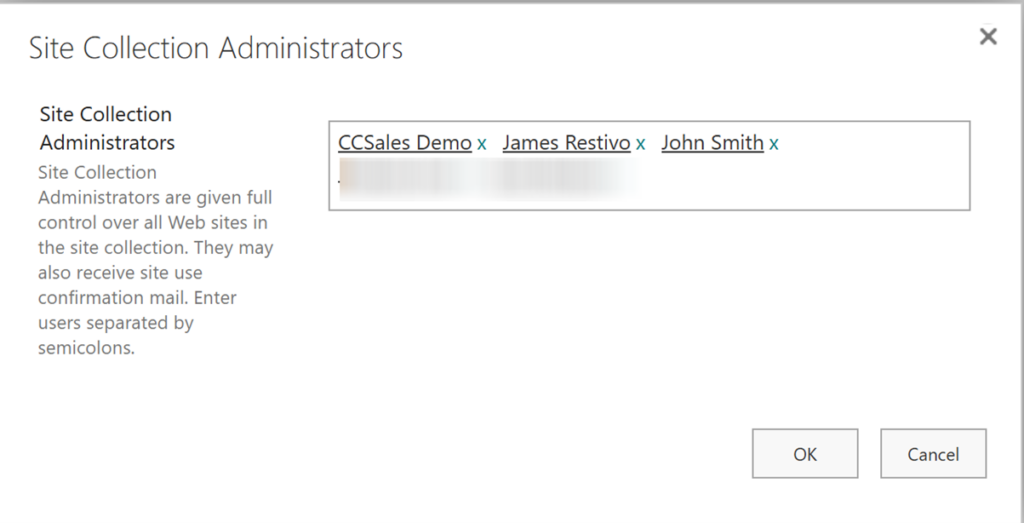
- In the top ribbon of this page you should see “Site Collection Administrators” as a link, click it.
If you do not see the “Site Collection Administrators” link in the ribbon as highlighted above, you do not have high enough permissions on this site / site collection to do the update and will need to get another user to perform the update, or, grant you Site Collection Administrator permissions following the steps above. - You may not see your name in the list of administrators below, it is possible to have permissions to see this link and screen but not be the Site Collection Administrator for this Site Collection. You must see your name in the Site Collection Administrators listed in the screen shot below. If you have gotten to this screen, but are not listed, you should add yourself here and click OK.

Once you see your name in the Site Collection Administrators list as shown above, you may move on to Step 2 below.
Step 2: Get the list of site collections where NITRO Studio is installed
To view the list of site collections where NITRO Studio is installed, go to the Subscription Details section on the NITRO Admin page. Follow these steps to navigate:
Similar to the above URL change, enter this URL sufix to replace the one you are on now:
/_layouts/15/settings.aspx
This should look like this:
https://<yourdomain>.sharepoint.com/sites/<yoursite>/_layouts/15/settings.aspx
This brings you to Site Settings, under the Site Administration heading click Crow Canyon NITRO Apps as shown below:

In some situations you may not see the Crow Canyon NITRO Apps link on this page as show above. If this is the case for you do the below bulleted steps, if you see the Crow Canyon NITRO Apps link above, skip the bulleted steps:
- Go to any page in your NITRO / Crow Canyon site that you commonly use. This URL will have one more layer than the URL we were using above. It will look like this:
https://<yourdomain>.sharepoint.com/sites/<yoursite>/<yourSUBsite>/<other info not needed>
- Replace /<other info not needed> above with this:
/_layouts/15/settings.aspx - To get a url like this:
https://<yourdomain>.sharepoint.com/sites/<yoursite>/<yourSUBsite>/_layouts/15/settings.aspx
This will result in a page with this header, click the ‘NITRO ADMIN HOME’ link outlined in red below

You are now on the NITRO Admin Home page for this site collection.

The following window will appear where you can see all site collections:

As shown above, in the purple top ribbon, select ‘All Site Collections’, then Click ‘Clear deleted site collections’ to remove any deleted site collections.
You will see ‘please wait…’ while it processes as shown below:

After that, Click the ‘All Site Collections” link in the purple top ribbon again to view all site collections where NITRO Studio is activated.
IMPORTANT:
This is the list of all your active Site Collections that will need to be update. EVERY site collection listed here will need to be updated to complete this mandatory update. Each will need Step 4 below completed on it. Step 3 is only needed one time.
We suggest you keep this page loaded as it is now, showing the list of each Site Collection needed. You can click the Site Collection link in the far left column of this list to navigate in a new tab to the first site collection. The link will go to the home page of that site collection. You may add this to the end of the URL this link brings you to: /_layouts/15/settings.aspx
This should look like this:
https://<yourdomain>.sharepoint.com/sites/<yoursite>/_layouts/15/settings.aspx
This brings you to Site Settings, under the Site Administration heading click Crow Canyon NITRO Apps as shown below:

This will result in a page with this header, click the ‘NITRO ADMIN HOME’ link outlined in red below

This page is the NITRO Admin Home page for the site collection. This will be the starting place for Step 3 and 4 below.
Step 3: Update NITRO Studio “components” for ALL site collections.
NITRO Admin Home page will show a message with a Setup button as shown below. If solutions are already up to date, then this button will not be shown. Clicking on the Setup button will install/update all the required “components” for the NITRO Studio for the whole Tenancy (all site collections). This step is only needed once.

Click the Setup button and you will see this dialog box show up:

IMPORTANT: This process usually takes less than 5 minutes. If your computer sleeps or the internet connection fails, you will need to start over from the beginning of step 3.
When the process completes you will see this message, click the Close button.

This will return you back to the NITRO Admin Home page for the site collection, you should no longer see the banner with the Update button, it should now look like this:

If your page looks like the above you are ready to do step 4 for this site collection.
Step 4: Update NITRO Studio in the NITRO activated sites:
Now that the “components” are updated, we are ready to update NITRO Studio on each site in this collection. We have 2 options for this; Update All Activated Sites -OR- Update One Site at a Time:
- Update All Activated Sites: Perform a bulk update for all sites where NITRO Studio is activated within a site collection. This is the recommended method for this update.
- Update One Site at a Time: Update NITRO Studio for a single specific site in this site collection. This method can be used out of an abundance of caution, or, if an error occurs or the update times out for some reason when updating All Activated Sites.
Step 4, Option A: Update all sites in the site collection in one go
- Navigate to the NITRO Admin Home page:
Note: you likely are already on this page from Step 3, if not: Site Settings -> Crow Canyon NITRO Apps -> NITRO Admin Home - Check that the Latest Version you see is V2.6.X as shown highlighted on the lower left below:
Click Update All Activated Sites as shown in top right arrow below. You can use this link even if there is only one site showing in the ALL SITES section.
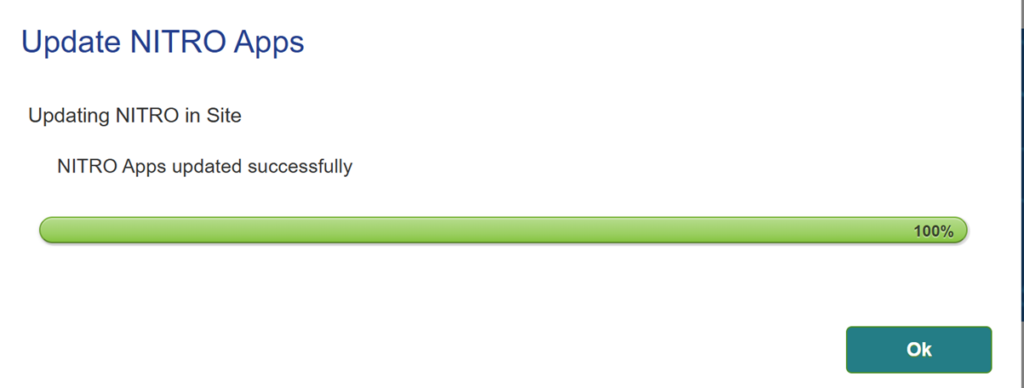
- A pop-up window will appear—click ‘Ok’ to proceed with updating NITRO in the activated sites. The update will take some time depending on the number of sites and their current configurations.
Here is an example of a Site Collection with 26 sites that will take about 13 hours to complete:


Step 5: Repeat steps 1, 2 & 4:
IMPORTANT:
If you had more than one Site Collection listed above in Step 2 (see similar grey box like this), each of those need Step 4 completed. Step 3 is only needed one time. Steps 1 & 2 are for navigational assistance, there are navigation shortcuts listed below.
If you have more than one site collection (see Step 2: Get the list of site collections where NITRO Studio is installed above). You will need to repeat the Bold Red Steps 1, 2 & 4 above
Navigational Shortcuts:
- If you know you have Site Collection Administrator permissions for all your Site Collections, you can skip Step 1 above
- Reminder in Step 1 above we suggested you leave the page that has the links to all Site Collections open in your browser, if you have that page open you may click the link on the next site down to launch that site collection.
- From that link you may add this url suffix to get to the Site Settings:
/_layouts/15/settings.aspx - In Site Settings you can click Crow Canyon NITRO Apps under the Site Administration heading.
- On the resulting page, click the ‘NITRO ADMIN HOME’ link just below the left side of the blue header.
- This gets you to the start of Step 4 for this next site collection, here is a quick jump link to that step above:
JUMP to Step 4
- From that link you may add this url suffix to get to the Site Settings:


