Applies To: SharePoint Online
Pre-requisites
NITRO Studio can be installed using below permission levels:
- NITRO API (Tenant level)
- NITRO Site API (site.selected)
- Activate NITRO for a Site Collection (Applicable for NITRO API and NITRO Site API)
The first step is to decide which permission level to use for the installation. For more details about NITRO API vs NITRO Site API permission levels and other permissions required for NITRO Studio, please refer to this article.
User Permissions
- The user doing the installation requires Office 365 Global Admin rights on the SharePoint online tenancy where NITRO Studio is being installed.
- Note: If NITRO Studio is already installed in any other site collection in the tenancy, then a user with site collection Administrator permissions can perform the installation. In this case, Office 365 Global Admin permissions are not required.
App Catalog
- NITRO Studio modern apps to be added to the app catalog site of the tenancy for installation.
- If app catalog site does not already exist in your tenancy, it can be created as per the steps given in this article.
Site Collection:
- To install NITRO Studio in a new site collection, the SharePoint Administrator can create a new site collection.
- Or installation can be done in an existing site collection.
Custom Scripting:
NITRO Studio installation requires that custom scripting is enabled for the site collection. Please refer to this article for details on the use of custom scripting in NITRO Studio.
- Enable custom script in app catalog site collection and the site collection in which NITRO Studio will be installed.
- Use the PowerShell to set the Tenant level flag to not disable the custom script (see the last step in below article)
Please refer to this article How to enable scripting capabilities with PowerShell – Crow Canyon Software Support to enable custom script.
Access Control:
If “Allow access from specific IP Address locations” is enabled in Access Control for the tenancy, please refer to this article https://www.crowcanyon.help/article/397/#Symptom2 and allow the IP Addresses.
Detailed Steps
1. Navigate to the site below to initiate installation of modern NITRO Studio.
https://crowcanyonnitro.azurewebsites.net
2. Above site requires user to login with Microsoft 365 account credentials. To login, use a Global Administrator account of the tenancy where NITRO Studio is to be installed.
With a Global Administrator account, the user will see the below prompt:
Select “Consent on behalf of your organization” and click “Accept” so that this prompt will not be shown when other users open the NITRO page.

Users accessing this page with SharePoint Admin permissions or only Site Collection Administrator permissions will not see “Consent on behalf of your organization”.
Note: SharePoint Admin has SharePoint specific Admin privileges, but not on complete office 365 which has various other parts.

3. After accepting Crow Canyon Authentication API prompt, the user will navigate to the NITRO page (NITRO API Tenant-level permissions) by default.
Refer to this article for more details on permissions. To continue installation using NITRO API, stay on this page and follow the below steps. To install using NITRO Site API, click NITRO Studio (Site) link at the bottom of the page and follow the steps given here.

Install using NITRO API (Tenant-level permissions):
Note: The user needs Global Admin rights to Grant permissions and install Modern NITRO Studio.
On below page, user can grant permissions by clicking the ‘Grant Permissions’ button.

After clicking ‘Grant Permissions’ below window will be shown:


Click ‘Accept’ to grant permissions. Permission granted message will be displayed.

Repeat the same steps for other apps and grant permissions.
Step 2: After granting the permissions, page will be refreshed to show active site collections in the tenancy. Proceed to install Modern NITRO Studio in the required site collection.


After installation is completed, ‘Manage’ link will be shown besides the Site Collection.


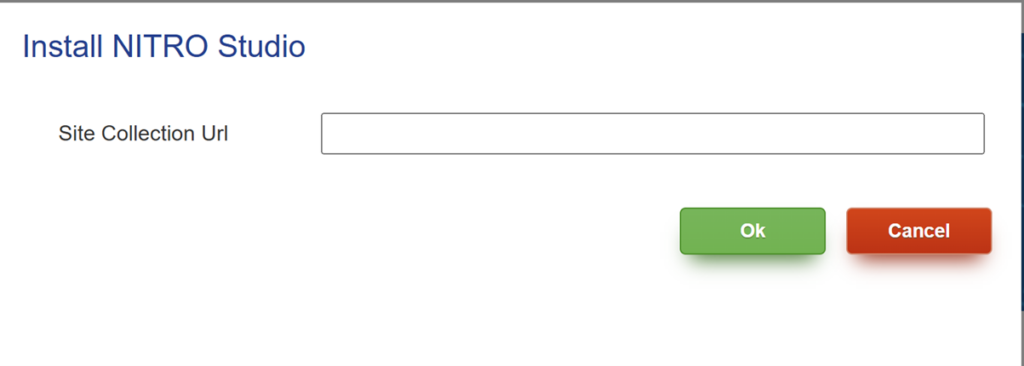
Clicking ‘Install NITRO Studio’ will open the window shown below. Enter the Site Collection URL to install the modern NITRO Studio.

After installation is completed, ‘Manage’ link will be shown besides the Site Collection. Clicking ‘Manage’ will navigate to the NITRO Studio page for the Site Collection as shown below:

To activate NITRO Studio in a sub-site of the site collection, follow steps given here.
Install using NITRO Site API (site.selected)
By default, user will navigate to the NITRO API page (URL: https://crowcanyonnitro.azurewebsites.net/NITRO ). Click “NITRO Studio (Site)” link to install NITRO Studio with “NITRO Site API” permissions level.

NITRO Site API permissions:
When user clicks “NITRO Studio (Site)”, below prompt will be shown. This permission is required for login to NITRO Studio installation home page.
Users with Global Administrator permissions can accept the API permissions. These are delegated permissions that require user to be logged-in to perform any operations using this API.
These permissions are used only on this page and do not grant any additional access to NITRO APIs. These permissions are used for allowing access to NITRO Studio Site API / NITRO Approval Site API / NITRO Workflow Site API / NITRO Product Site API on the site collection where NITRO Studio is being installed.

After accepting the API permissions, it will open the NITRO Studio site page:

Granting permissions with the Global Administrator account will enable NITRO site API for the Tenant. This step will not grant access to NITRO site API to any of the site collections. Whenever NITRO Studio is installed in any of the site collections, then the NITRO site API will get full control permissions on that site collection (using the delegated permissions granted to Crow Canyon Authentication API).
Refer this article for more details on NITRO Site API access on a specific SharePoint site collections.
Note:
All the above app permissions have the same level as NITRO Site API (full control on the site collection). We need to grant permissions separately as we need to identify which app context has been used to create/update items in the SharePoint lists.


After granting permissions for all the apps, Site Collection Administrator permissions are enough to install NITRO Studio for a site collection.
Note: User should have read permissions on the app catalog site collection.
Click ‘setup’ button to install the NITRO modern apps in the tenant app catalog.

Click “Install NITRO Studio” button to install NITRO Studio for a site collection.
All site collections where NITRO Studio is installed will be shown on the below page under “ACTIVE SITE COLLECTIONS”. NITRO Site API does not have access to all the site collections, due to this it cannot list the site collections in the tenancy.

Specify the site collection URL and click Ok. This will install the NITRO Studio in the site collection.
Note: Enable custom script for the site collection to install NITRO Studio.

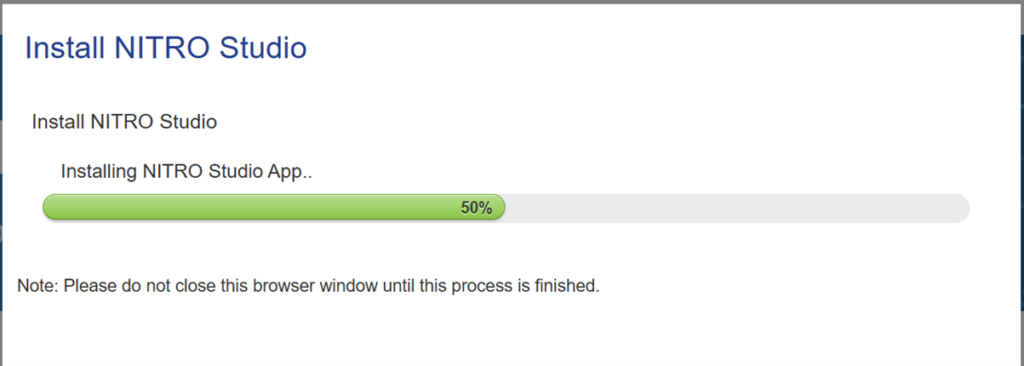
This process will take some time, please wait until it is completed.
Activate NITRO for a Site Collection (Applicable for NITRO API and NITRO Site API)
- Open the Crow Canyon NITRO Studio page from the site collection where NITRO is installed.
- This page link can be accessed in below ways in the Site Collection:
- Click “Crow Canyon NITRO Studio” quick launch link in the root site collection.
- Click Site Settings button (gear icon) in top right corner -> click ‘Crow Canyon NITRO Studio’ link.

- Go to Site Settings -> Click ‘Crow Canyon NITRO Studio’ link as shown below:

3. Click ‘Activate’ button to activate NITRO studio apps for a site.

Select ‘License Type’ and click ‘Ok’.

4. After NITRO Apps activation, the “Crow Canyon NITRO Apps” and “Crow Canyon Branding” links will be available in ‘Quick launch’ and also under ‘Site Administration’ of ‘Site Settings’.

Site Settings:

Crow Canyon NITRO Apps page:


Note: In Modern NITRO Studio, ‘ID Column’ app is not supported. You can configure the ‘ID Column’ functionality using NITRO Workflows/Custom Actions/Form Event Actions. The rest of the app’s functionality will be same as the classic NITRO Studio.
In Classic NITRO Studio, pages are hosted in an Azure site outside of the SharePoint tenancy. In modern NITRO Studio, pages are hosted within the SharePoint site collection as SPFx components.
Observe the difference between Classic and Modern Nitro Studio URL as shown below
Classic NITRO Studio URL:

Modern NITRO Studio URL:

Troubleshooting steps for NITRO Studio installation/activation
If using Firefox browser to install NITRO Studio, turn off ‘Enhanced Tracking Protection’ in the browser tab.


