Applies to: SharePoint online and On-premises (2013, 2016, 2019 and SE)
Description
Form Event Actions enable advanced custom functionality in NITRO Forms.
These actions can be invoked:
- On form load.
- On a column value change.
- By user clicking on a button on the form (‘Execute Manually’).
For sample use cases of form event actions on form load and on column value change, refer to below articles:
This article describes the use of manually executed form event actions in NITRO Forms.
Example scenario
Set ‘Due Date’ column value on the form based on some data on the form and some calculation. For example, ‘Today’ or some date column on the form plus 5 days. In some scenarios, this will be done automatically when a column value is changed on the form. Like user may set the priority and based on that due date is automatically calculated (using form event actions on column value change). In other cases, user will review the data on form and then decide to do an action. There could be more than one button on the form and user will click the required button to invoke the appropriate form event action. This is the case for manually invoked actions that will perform the required changes on the form.
Buttons are of two types. Script action buttons are used to execute the required script or form event action and after that user can continue editing the form. Submit buttons also do the same but save the item after running the script/action.
For more details about the action buttons, refer to this article: https://www.crowcanyon.info/nitro/appmanual_v2/actions.html
Detailed Description
We can execute form event actions that are set to ‘Execute Manually’ using ‘Script Action’ and ‘Submit Action’ buttons in new and edit forms.
Script Action:
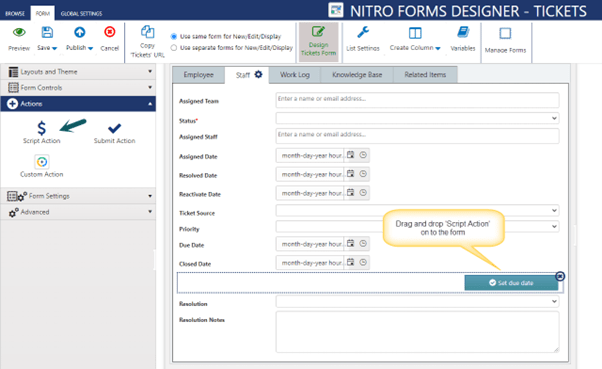
Configure script action button on the form. Refer to images below.
Go to NITRO Forms Designer for the list à Expand ‘Actions’ section à Drag and drop ‘Script Action’ button on the form.
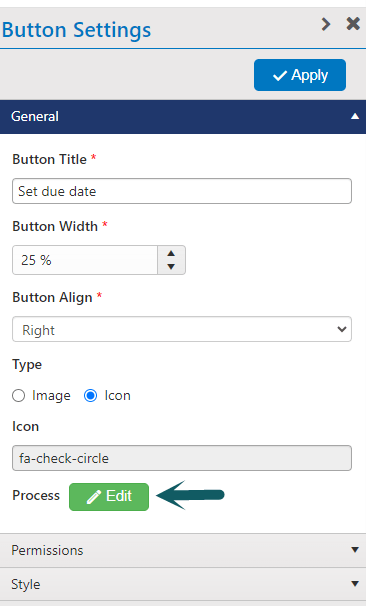
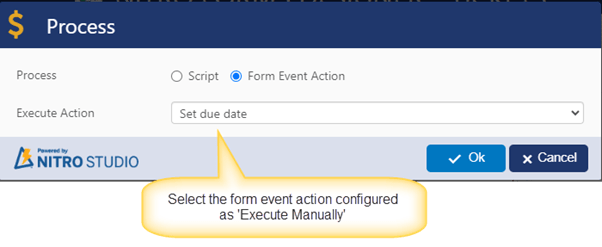
From button settings in right-hand panel, click ‘Edit’ button for process à Select ‘Form Event Action’ in the ‘Process’ dialog à Select the required form event action from ‘Execute Action’ drop-down. This drop-down shows all those form event actions that are selected to execute manually.
Submit Action
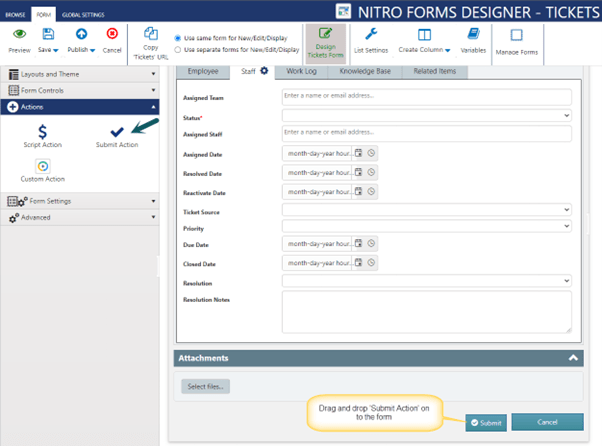
Configure submit action button on the form. Refer to images below.
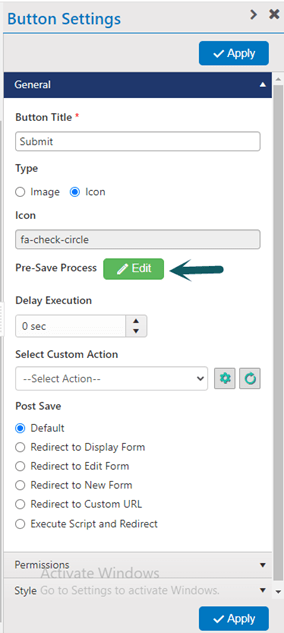
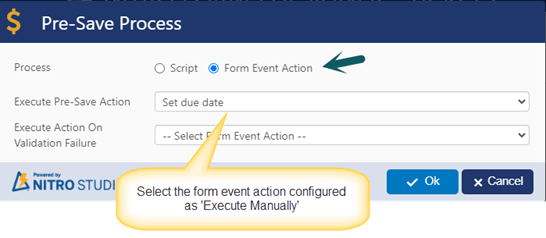
Go to NITRO Forms Designer for the list à Expand ‘Actions’ section à Drag and drop ‘Submit Action’ on the form. à From button settings in right-hand panel, click ‘Edit’ button for pre-save process à Select ‘Form Event Action’ in ‘Pre-Save Process’ dialog à Select the required form event action from ‘Execute Pre-Save Action’ and ‘Execute Action on Validation Failure’ dropdown.
These dropdowns show all the form event actions that are configured for manual execution.
Sample use case:
Set due date column value as 5 business days from ‘today’ on a Ticket form.
Sample list schema and use case:
- Standard SharePoint list
- Due Date: Date and Time column
- Set ‘Due Date’ column value 5 business days from ‘today’.
- Due Date: Date and Time column
Instructions:
Configure a form event action as shown below:
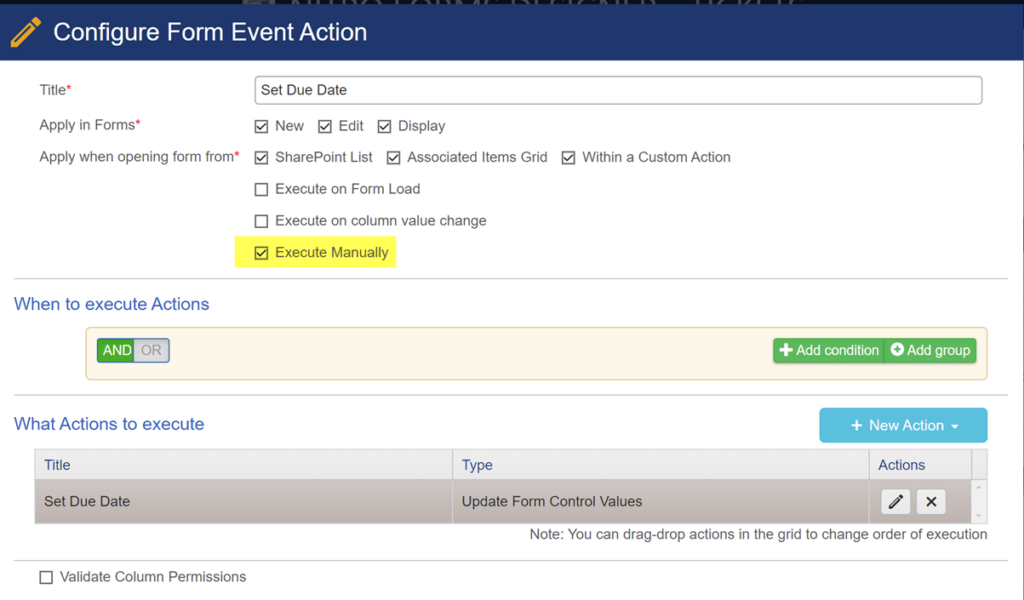
‘Configure Column mapping for ‘Due Date’ column in ‘Tickets’ list:

After configuring the form event action, drag and drop ‘Submit Action’ button on to the form and invoke ‘Set Due Date’ form event action in the submit action pre-save script.
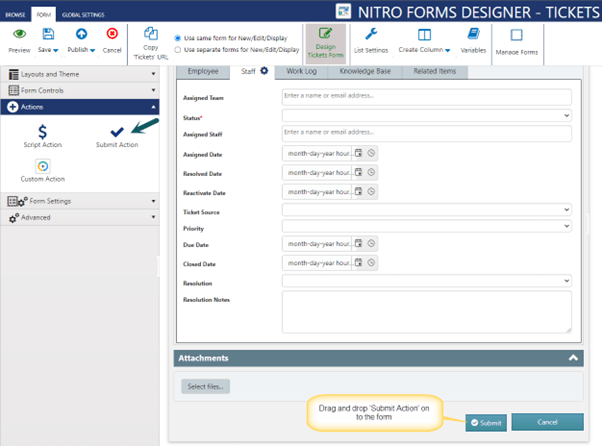
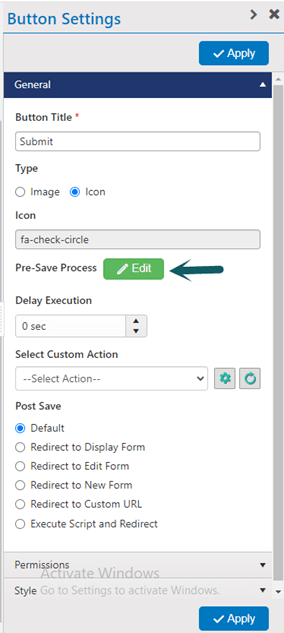
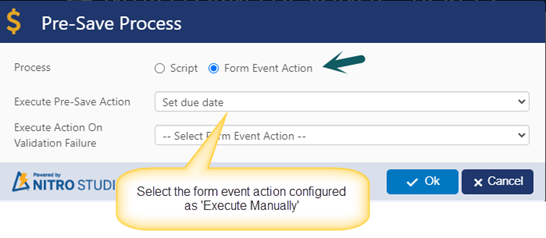
After configuring the submit action button, click ‘Submit’ action button on the form to execute the form event action. This will set the ‘Due Date’ column value before item is saved.
If there is chance that the form submit (item save) will fail due to validations on some column values, you can configure another manual form event action. In that action ‘Due Date’ value can be cleared. This is for scenarios where user will just ‘save’ the item and not ‘submit’ it after the data validation error. And in that case the form should not have a due date set. Select the action to clear the due date in drop-down “Execute Action On Validation Failure”.

