Applies to: SharePoint Online
Description
In certain cases when list and site structure is same, it is possible to export the NITRO Forms and Workflow configurations from one site and apply the same on other site having similar schema. Most common scenario is when there are two environments for an application: Development and Production. In this case forms and workflows can be configured and tested on development environment and then exported and applied to production. Any list and field changes in development environment should be applied to production before doing the export and import.
General Prerequisites
- SharePoint list and fields schema (list names, field internal name, display name and type) should match in both source and target sites to get the export and import to work
- If Forms and Workflows refer to other lists (lookup column relationships), then schema should match for these related lists as well
Export and Import Crow Canyon NITRO Forms
Functionality and Prerequisites
- List and related lists in source and target site should have same schema
- Associated lists should have NITRO Forms with same names. This will generally be the case if lists have same names
- All forms configured on the list are imported/exported and NITRO form settings of target list are overwritten, so user should back them up if required (by exporting)
- Note: User need to save/publish the settings after import
- If NITRO Forms are using submit actions which invoke NITRO custom actions, then actions with same Id should be present in target
- Unless these sites are created by our setups, generally action Ids will be different even though they may have same name. In this case, user can update the Form settings with correct action after import
Feature limitations
- Cross-site lookups/associated items are not supported
- If Script is used, and it has hard-coded site/list Id/URL etc., then this has to be updated manually in target after import
Steps to Export/Import NITRO Forms
Export
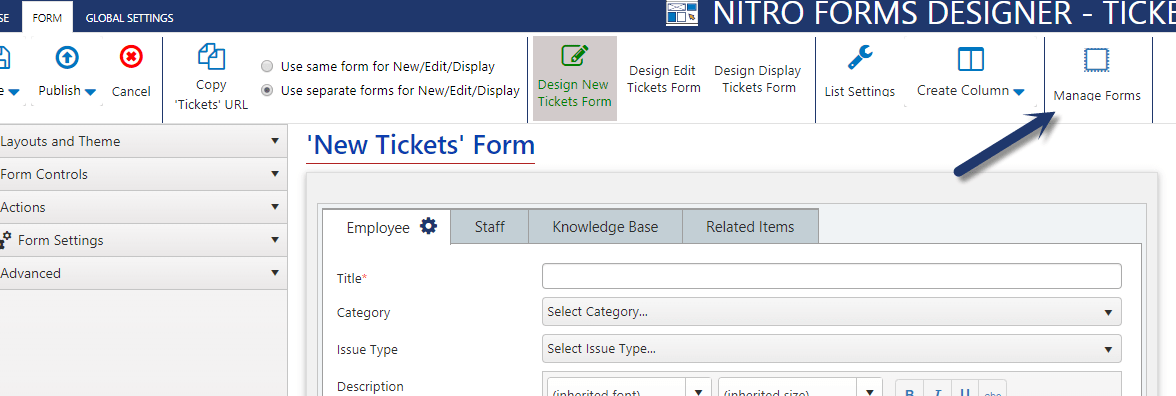
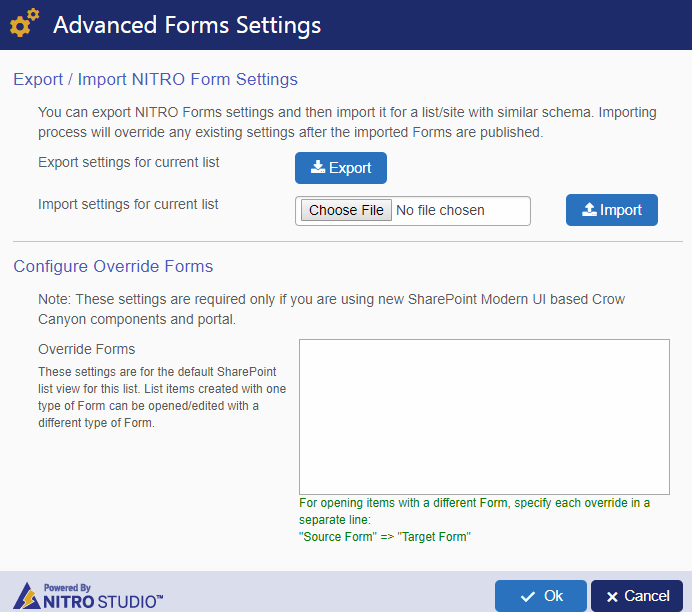
- Go to the source list settings –> Crow Canyon NITRO Forms –> click on “Manage Forms” in Form Ribbon as shown below –> click on “Advanced Settings” –> click on “Export” button, it asks to save the file locally as shown below:
Note: If multiple forms are configured in the list, then it directly opens the below dialog when we open the NITRO Forms for that list.


Import
- Go to the target list settings, Crow Canyon NITRO Forms, click on “Manage Forms”, click on “Advanced Settings”, click on “Choose File”, select the form settings exported file in above step and click “Import”. Please wait until the forms settings are imported and it shows the success message once the import is completed.

Note that these settings are not applied to list forms after the import, these are just imported in the designer UI. You need to publish the forms for these settings to take effect. You can make changes after import and then publish.
Export and Import Crow Canyon Workflow Manager Workflows
Feature Limitations
- Mail templates won’t be exported/imported. Once the workflow is imported, we need to edit the “Send Mail” actions, create the required mail templates manually and update the workflow settings.
Steps to Export/Import Workflow Manager Settings
Export
- Go to Site Settings, Crow Canyon NITRO Apps, Open NITRO Workflows, use the “Export Workflow Settings” button under the “Actions” column in the grid as shown below. When we click this export button, browser prompts to save the settings (*.json”) file locally, save to the local drives.


Import
- We can import the workflow manager settings as a new workflow. If we would like to override the existing workflows using import options, we can achieve by deleting the old workflow and create new workflow using the import option.
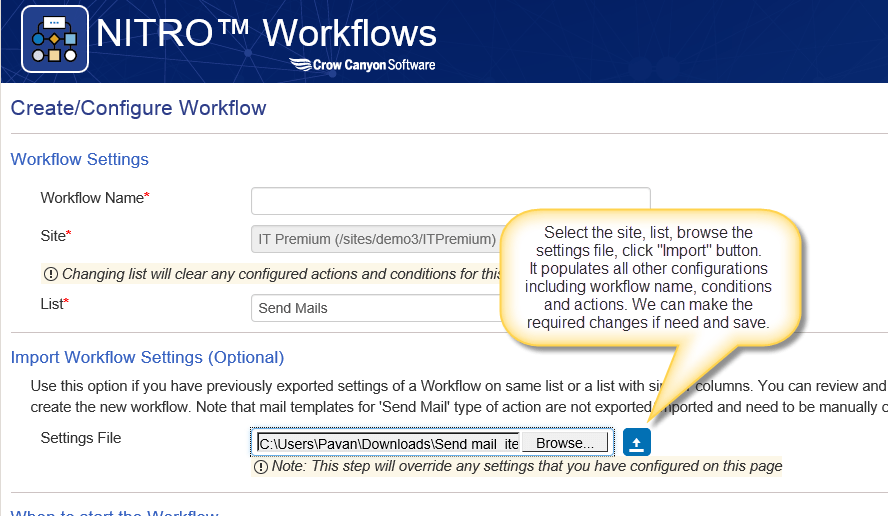
- Create new workflow, select site, list, browse the exported settings file, click “Import” button as shown below
Note: Please note that we have to reconfigure the mail template settings.
Export/Import form settings for a specific NITRO Form:
Use case: A list has multiple NITRO Forms and among those forms, a specific form’s settings need to be exported and imported to another NITRO form.
Steps:
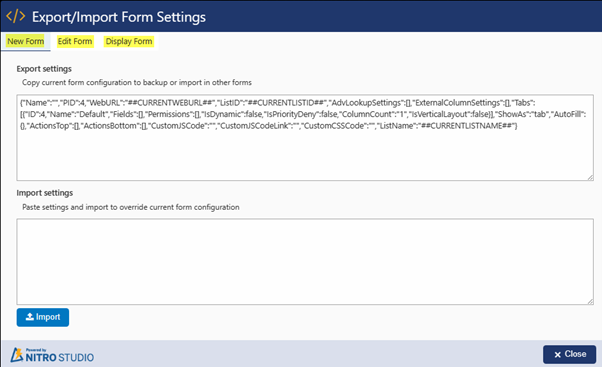
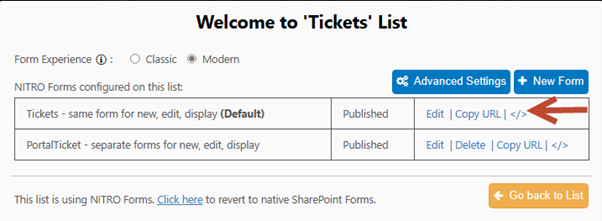
- Navigate to the source list -> List Settings -> Crow Canyon NITRO Forms -> Click the icon ‘</>’ for the desired NITRO Form whose settings needs to be exported as shown below:
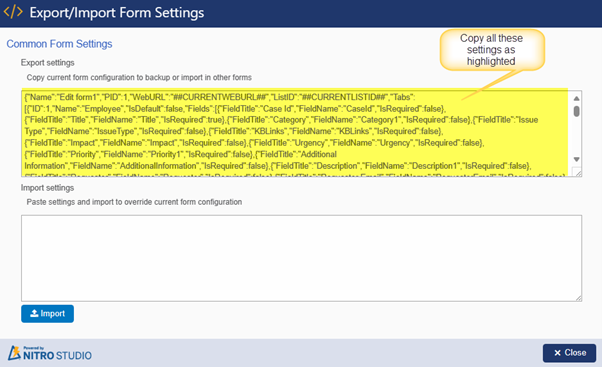
2. In the opened window, under ‘Export settings’, copy the form settings and paste them in notepad as shown below:
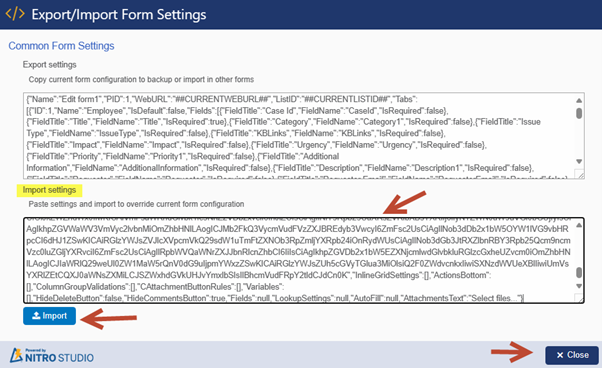
3. Navigate to the target list -> List settings -> Crow Canyon NITRO Forms -> Click ‘</>’ for the desired NITRO Form where the settings need to be imported -> Paste the form configurations under the ‘Import settings’ (that were exported in #2 above) -> Click ‘Import’ button as shown below:
4. Publish the NITRO Forms and check the result.
Note: If a list has separate NITRO Forms for ‘New, Edit and Display’ then, we need to export and import the settings for each form from the source to the target forms as shown below:
