Applies to: SharePoint online and On-Premises
Description:
This article describes about how to configure custom themes and apply the same for the sites.
By default Crow Canyon provides five different themes listed below.
- Crow Canyon Mustard Theme
- Crow Canyon Black Theme
- Crow Canyon Green Theme
- Crow Canyon Yellow Theme
- Crow Canyon Blue Theme
To get started with custom branding, we can start with any of the CSS file above except #1 and #2. Mustard and Black themes are not supported for customization.
Summary of Steps:
- Apply default branding to the Site
- Configuring Custom Theme
Detailed Instructions
1. Apply default branding to the Site
- To configure custom theme, first apply the branding for the site with any of the customization supported default Crow Canyon themes with default quick launch type.
- Go to the Site –> Site Settings –> Crow Canyon Branding –> Select the theme (ex: Blue Theme) and select the type of quick launch as “Default” and click apply.
- It will create a CSS file at Site Contents –> Site Assets –> CCS –> Branding.
2. Configuring Custom Theme
- Download the created CSS file in the above step from the below location.
- Go to Site Contents –> Site Assets –> CCS –>Branding –> Download the “BlueTheme.css” file and make changes to the css as needed and save the file with a different name.
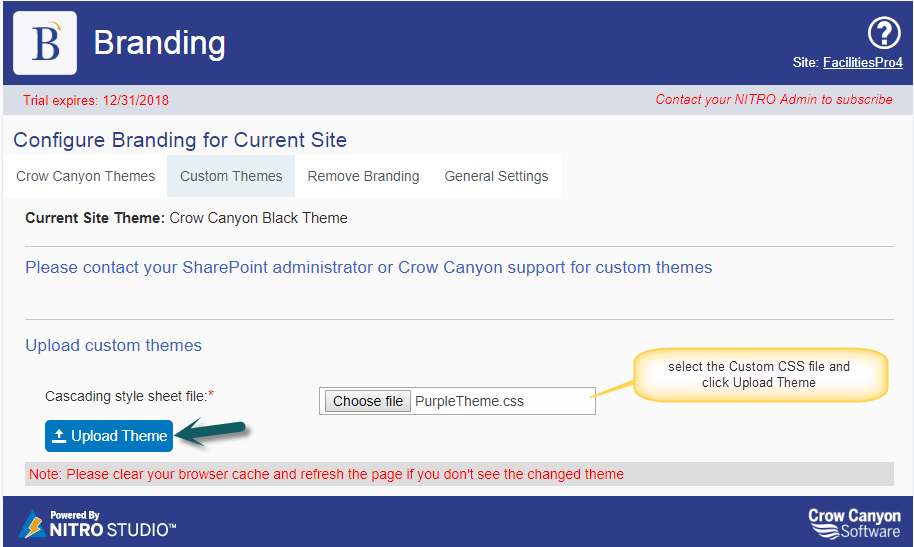
- Upload this file in “Custom Theme” tab under ‘Upload Custom Themes’ section (Screenshot below)
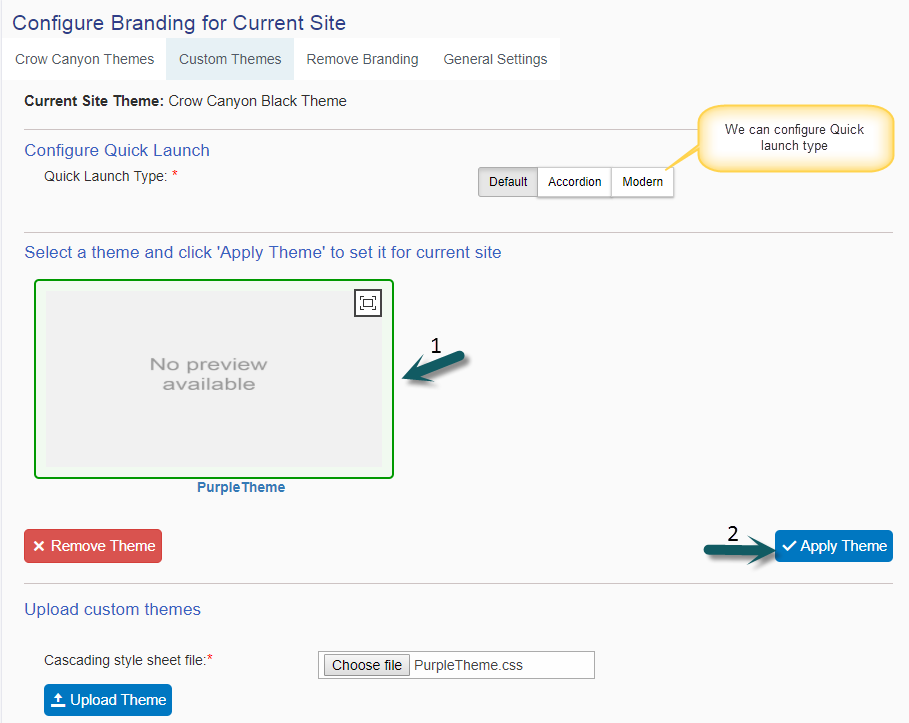
- After uploading, an entry gets created under ‘Select a theme’ section for newly uploaded theme (Sample screenshot below)

- Now apply custom theme on the site by selecting this custom theme along with a quick launch style.
- For more details, please refer Branding App at https://www.crowcanyon.info/nitro/appmanual_v2/.


