Applies to: SharePoint online and On-premises
This article describes about how to modify the default “Save” and “Cancel” buttons in NITRO forms and Portal forms and related functionality.
- Save button text change
- Cancel button text change
- How to redirect to custom page URL after submitting the form?
- Change background color and hover color of the buttons
To replace the Save and Cancel buttons, we will use Submit action and Script action buttons in Nitro forms. With these action buttons we can execute the custom script and also we can invoke the configured custom actions in Submit action. This article takes Tickets list as example, you can configure the same on any list.
Detailed Instructions
Save button text change
Go to IT help desk site –> Tickets list –> List Settings –> Crow Canyon Nitro Forms –> Select the desired form (one list can have multiple NITRO Forms configured)
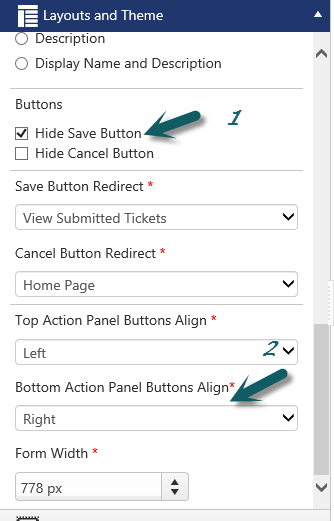
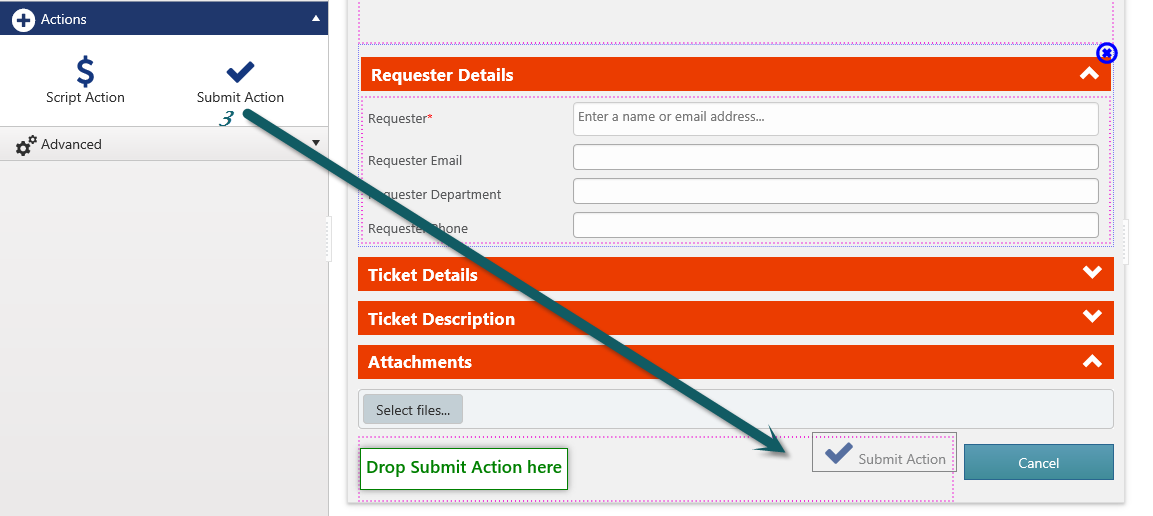
Hide the “Save” button under Layouts and Theme section and insert the “Submit Action” button. To insert the submit action button, drag and drop the Submit Action button from “Actions” section to the desired position on the form:
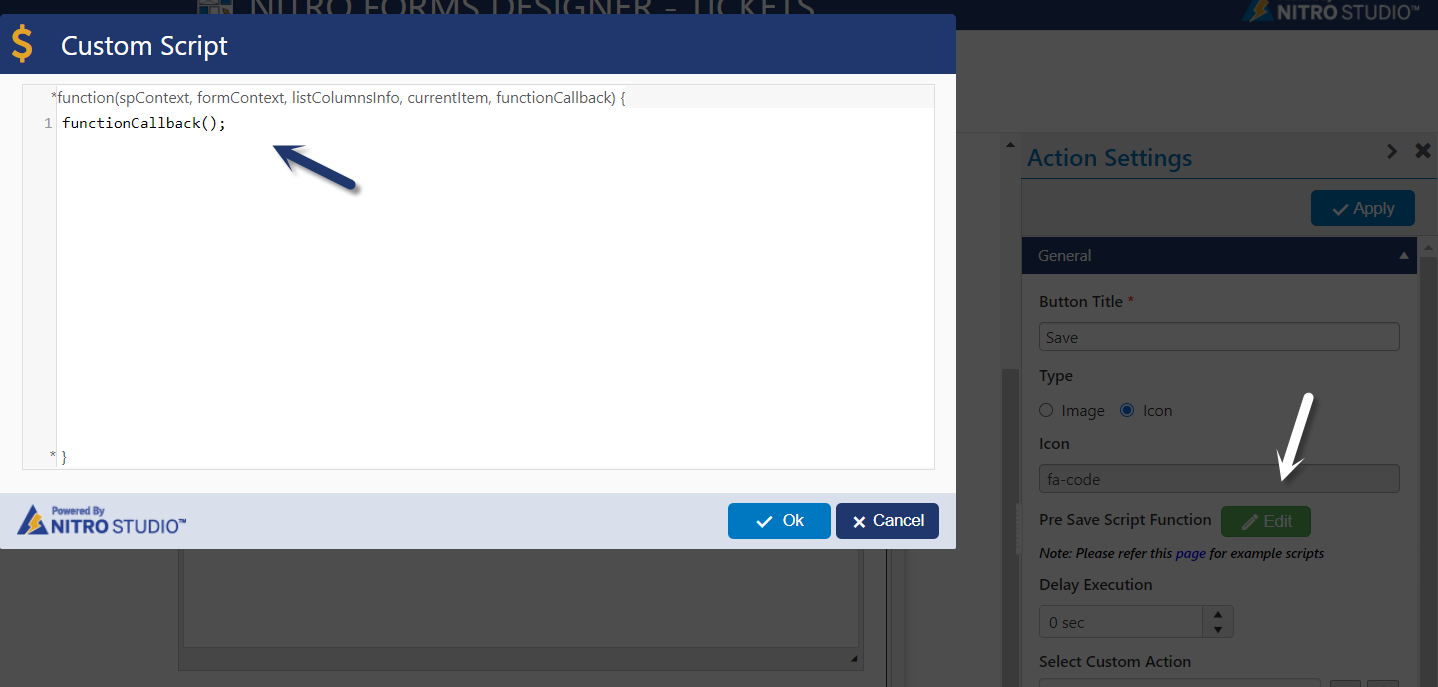
Rename Button Title to “Submit work Order” –> enter “functionCallback();” under Script Function panel under action settings like shown in below image.
Note: You can specify any text for the button title and select any image
To customize the width of the submit button, we can use Custom CSS in NITRO forms. Please go to Advanced section –> Custom CSS –> add below and save the settings.
.ccs_btn_SubmitAction{
min-width:150px !important;
}
Cancel button text change
Go to IT help desk site –> Tickets list –> List Settings –> Crow Canyon Nitro Forms –> Select the desired form (one list can have multiple NITRO Forms configured)
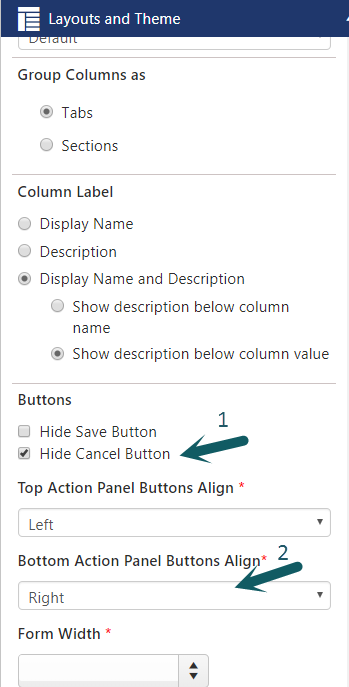
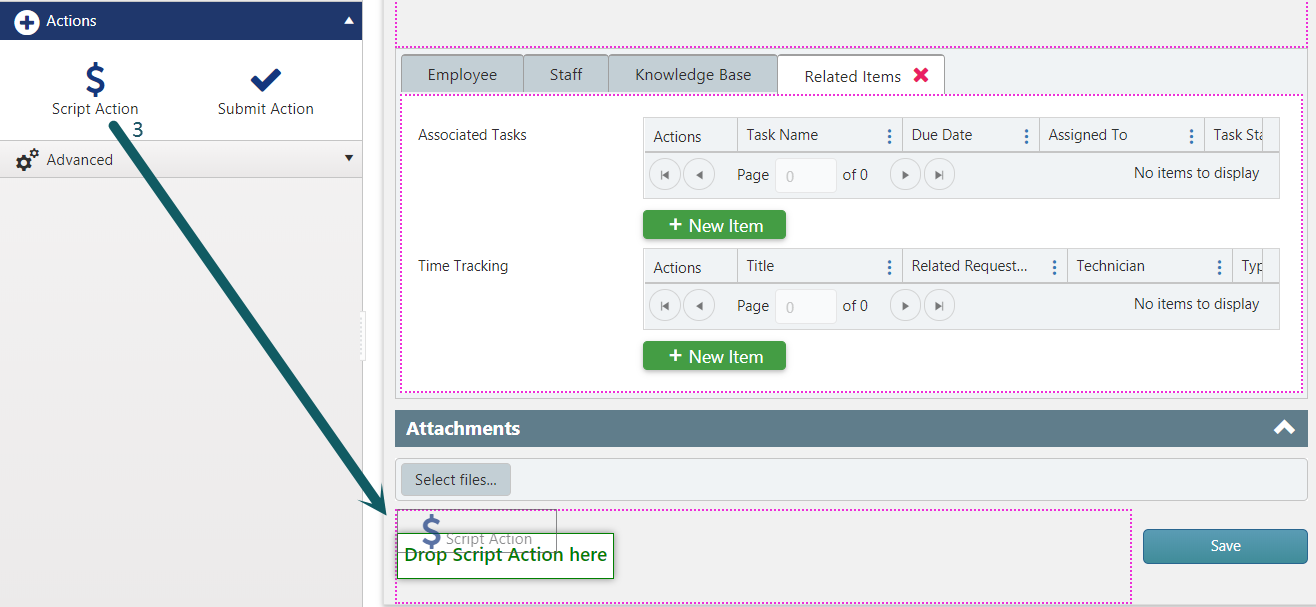
Hide the “Cancel” button under Layouts and Theme section and insert the “Script Action” button. To insert the script action button, drag and drop the Script Action button from “Actions” section to the desired position on the form.
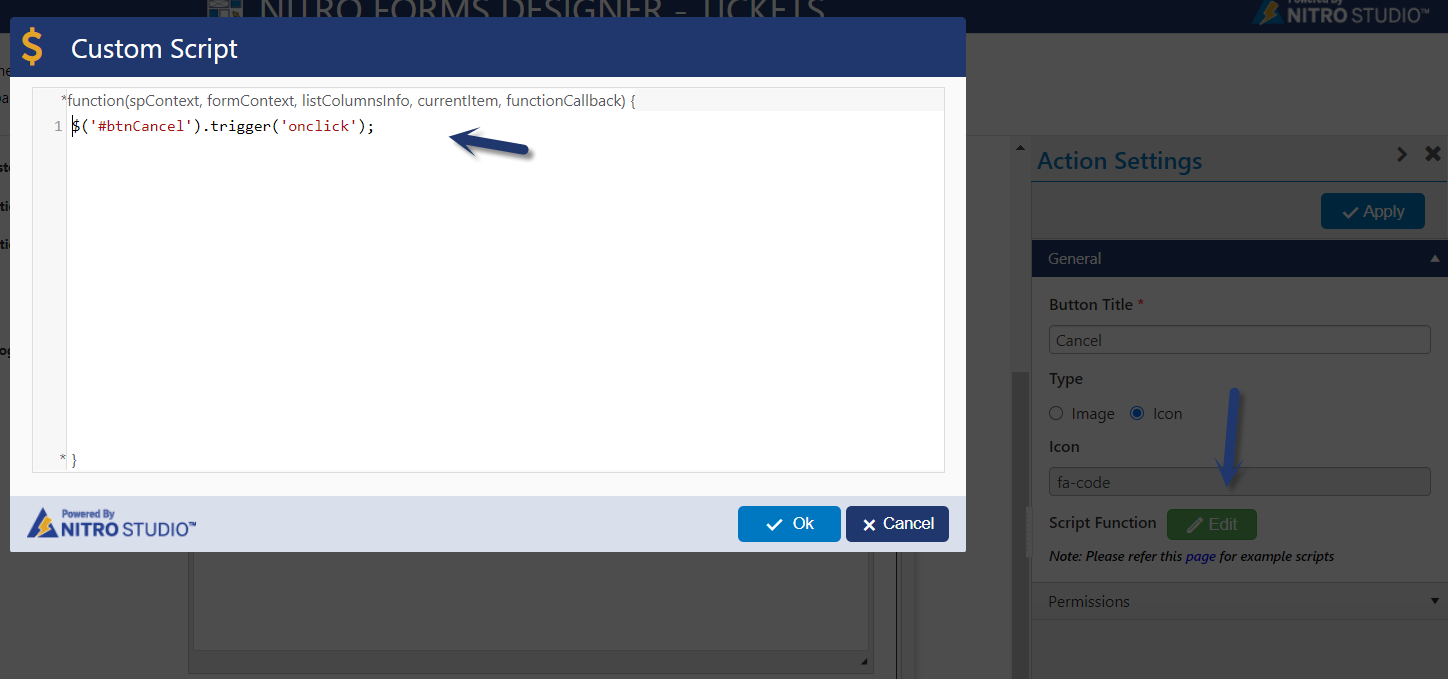
Rename the “Cancel” Button Title as required –> enter “$('#btnCancel').trigger('onclick');” under Script Function panel under action settings like shown in below image.
Note: You can specify any text for the button title and select any image
To customize the width of the submit button, we can use Custom CSS in NITRO forms. Please go to Advanced section –> Custom CSS –> add below and save the settings.
.ccs_btn_ScriptAction{
min-width: 150px !important;
}
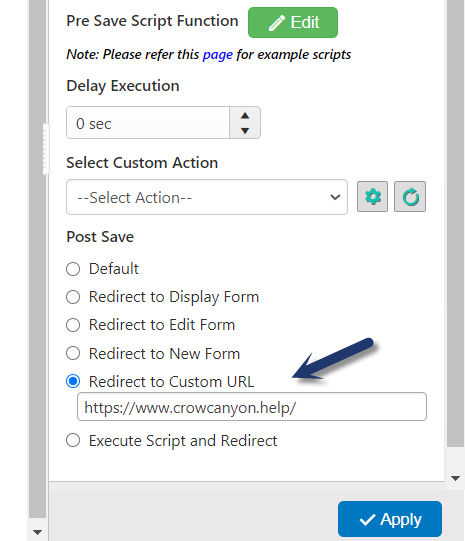
How to redirect to a custom URL after submitting the form?
For this we need to configure Post Save settings in submit button action settings in NITRO Forms
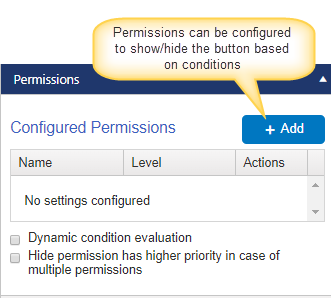
Permissions Configuration
To show this “Submit Work Order” action button only for the specific group of people, we can configure permissions for the action button. Select the button, go to permissions section and configure the permissions as required.
Change background color and hover color of the buttons.
- Navigate to NITRO Forms designer for the list -> Select the previously dragged ‘Submit Action’ button -> Expand ‘Style’ section from the button settings panel.
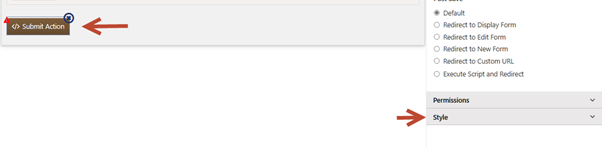
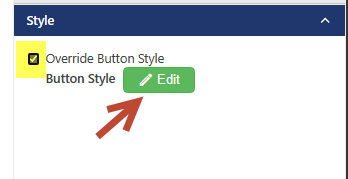
2. Under the ‘Style’ section, check ‘Override Button Style’ -> Click ‘Edit’ button as shown below:
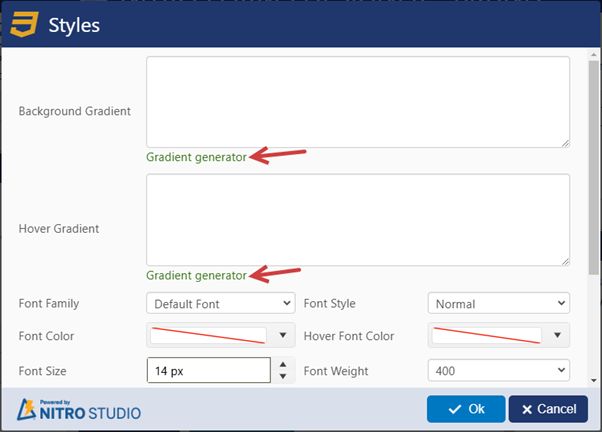
3. In the opened ‘Style’ pop-up, click ‘Gradient generator’ link under ‘Background Gradient’ as shown below:
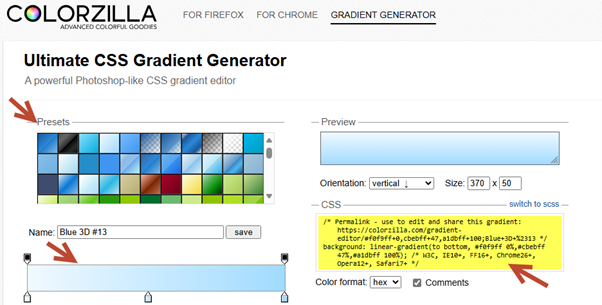
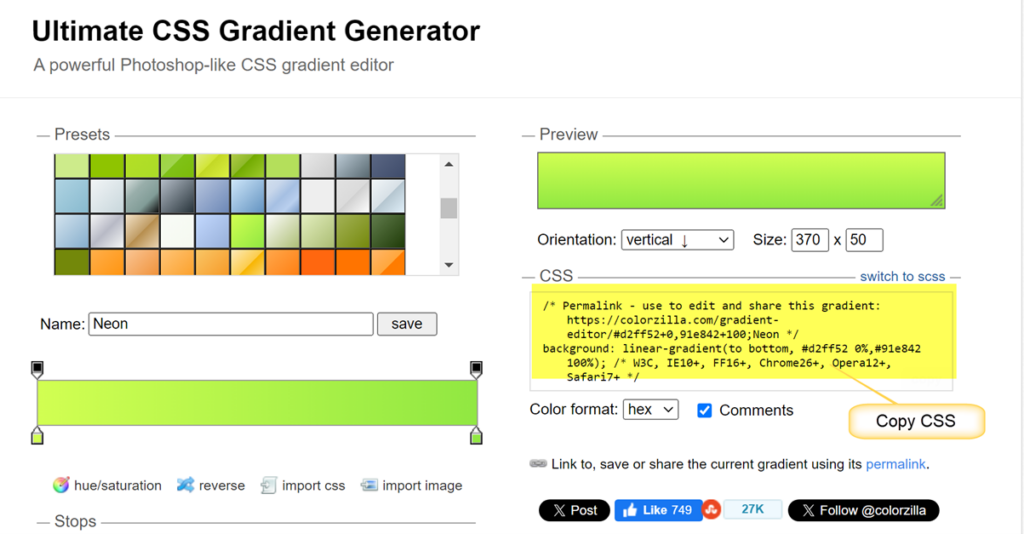
4. On the opened page (with URL: https://www.colorzilla.com/gradient-editor/), select any gradient from the ‘Presets’ option -> Drag the color slider to generate the required gradient -> Copy the generated CSS as shown below:
5. On the NITRO Forms designer page, paste the copied CSS in ‘Background Gradient’ section as shown below:
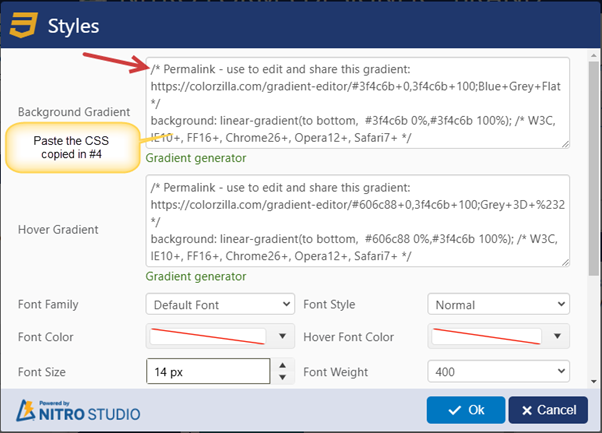
6. Similarly, generate the ‘Hover Gradient’ and paste the CSS in ‘Hover Gradient’ section.
7. Click ‘OK’ -> Click ‘Apply’ -> Publish the NITRO Forms.
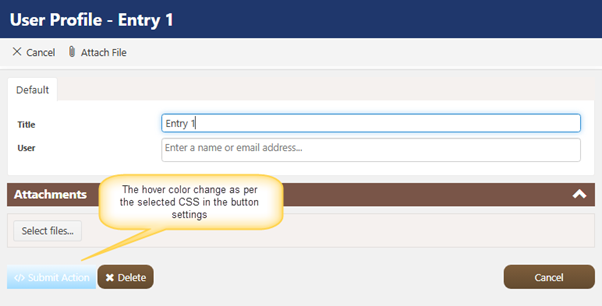
Sample output:
If ‘Background Gradient’ and ‘Hover Gradient’ needs to be changed for all the buttons on the NITRO Form and not just for one button, then the below steps can be followed:
- Navigate to NITRO Forms designer for the list -> Open ‘GLOBAL SETTINGS’ ribbon -> Edit or copy the current theme (or any other theme from the dropdown menu) as shown below:

2. Navigate to ‘Buttons’ tab in ‘Configure Forms Theme’ dialog -> Click ‘Gradient generator’ link under ‘Background Gradient’ -> Select any gradient from the ‘Presets’ option -> Drag the color slider to generate the required gradient -> Copy the generated CSS as shown below:
3. Paste the copied CSS code from above in ‘Background Gradient’ section.
4. Similarly, generate the ‘Hover Gradient’ and paste the CSS in ‘Hover Gradient’ section.
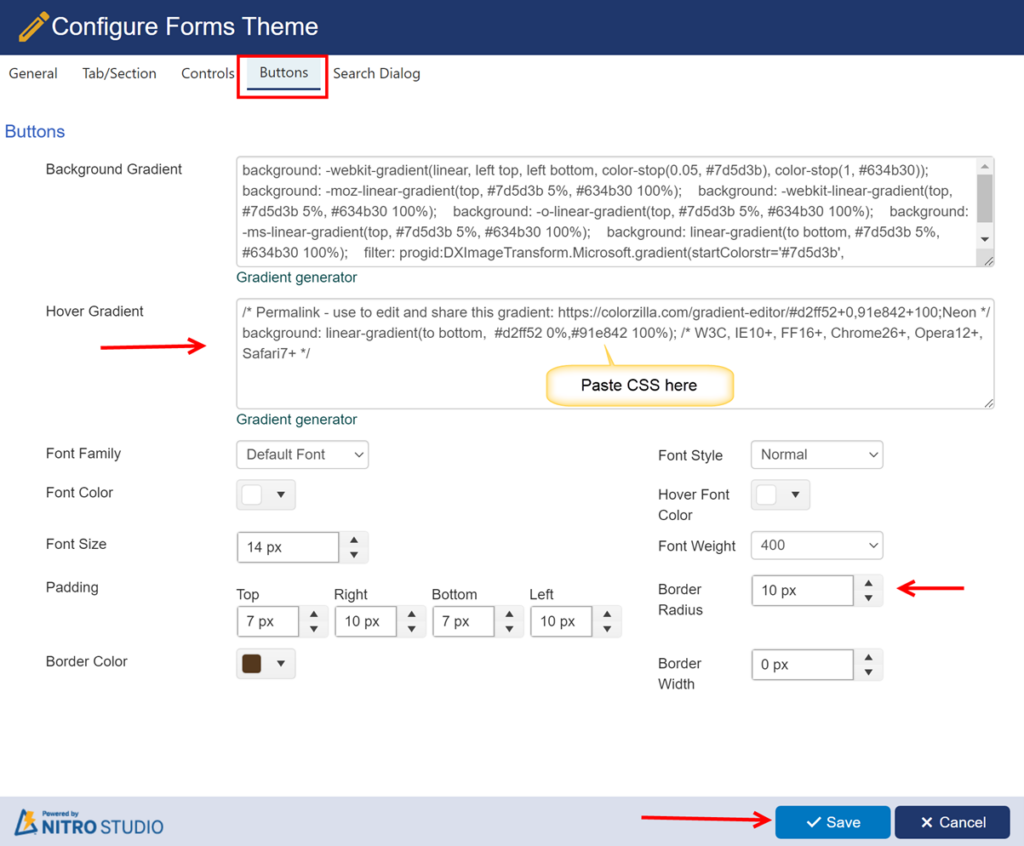
5. Also, check the “Border Radius” setting. The default value is ‘0 px’, increasing this number will increase the amount of rounding on the corners.
Sample output for the rounded corners when the ‘Border Radius’ is set to 10 px is as shown below:
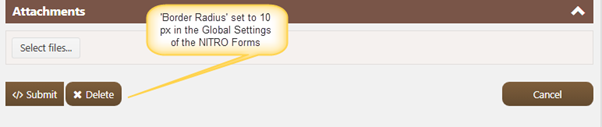
Note: In the above screenshot, ‘Submit Action’ button does not reflect the rounded corners because the style for this button has been overridden in #2 as explained at the beginning of this case.
Hence, individual styling takes precedence over the global settings set in the NITRO Forms.
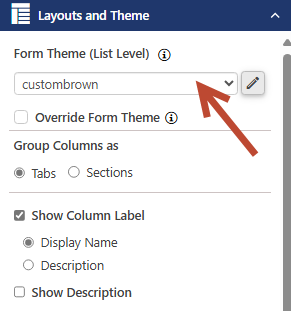
6. The applied changes can also be checked in real-time by selecting the edited theme under ‘Layouts and Theme’ section as shown below:
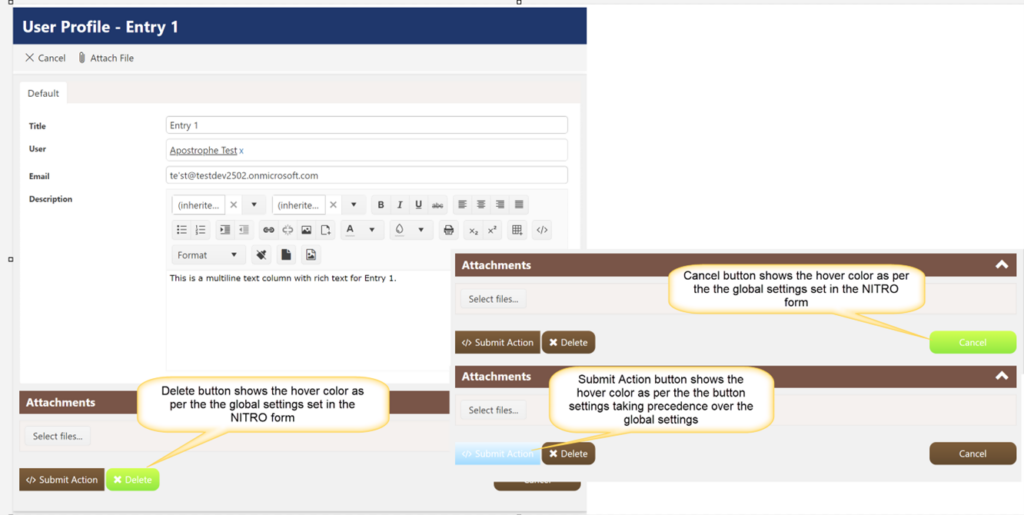
Sample output after changing background and hover color in the ‘Global Settings’ of the NITRO Forms:
More information about the themes can be found by referring to the below link: