Applies To
SharePoint Online and SharePoint On-Premises
Description
In Crow Canyon Service Request application, ‘Case Id’ of the Ticket is same as the SharePoint auto-generated list item Id. For any list, SharePoint generates the item id automatically starting from “1” and then incrementing it for every new item. This same value is copied in the Case Id column of the Ticket. If requirement is to start the Case Id from 5000 instead of default 1, then we need to create 4999 dummy items in the list and then delete them so that new Tickets get the Case Id starting from 5000.
This article describes steps to create items in bulk in SharePoint list using PowerShell. We need to follow different steps for SharePoint Online and On-premises environment as described below.
SharePoint Online
Pre-Requisites
- SharePoint Online Management Shell (download link) and SharePoint Client Components SDK (download link)
- Install both of these components in your machine (Run as Administrator)
- The account that we are going to use to run the script need “Add Item” permissions on the target list in SharePoint site
Steps to create list items in SharePoint list
Step 1
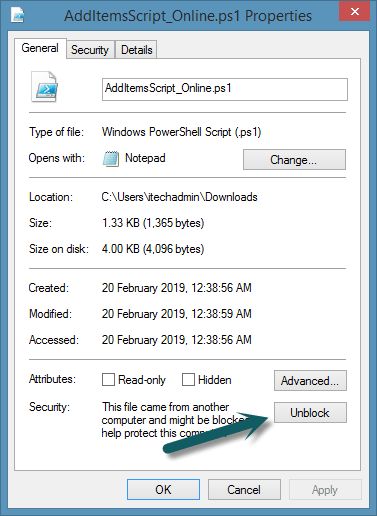
Download AddItemsScript_Online. Extract the zip file and find the “AddItems_Online.ps1” script file from the package. Right click on the file (AddItems_Online.ps1) –> Properties –> unblock the file if it is blocked as shown below:
Step 2
Edit the script using notepad and replace the [Site URL], [List Name] and [Number of Items] with actual values as shown below:

Step 3
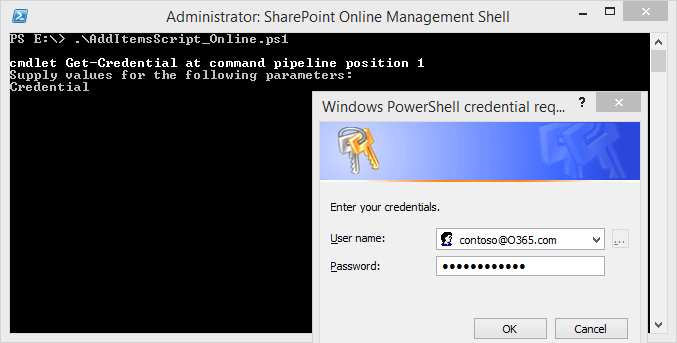
Run “SharePoint Online Management Shell” as administrator –> change the directory path to the location where our script file exists –> enter the script file name and hit enter as shown below:


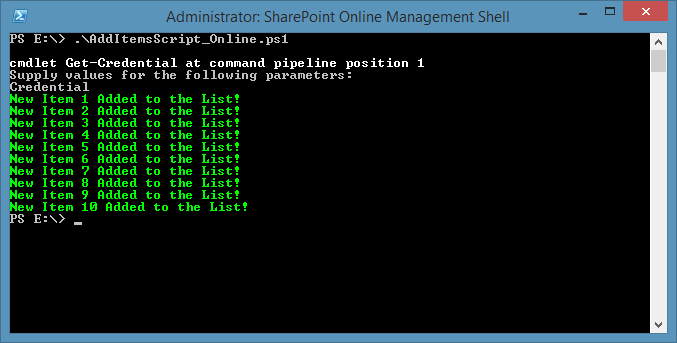
It will prompt for O365 user credentials and once the credentials are specified, the list items creation starts as shown below:
SharePoint On-Premises
Pre-Requisites
- Login to the SharePoint server using an account which is a domain user and local admin
- Logged in user should have “Add Item” permissions on the target list in SharePoint site
Steps to create list items in SharePoint list
Step 1
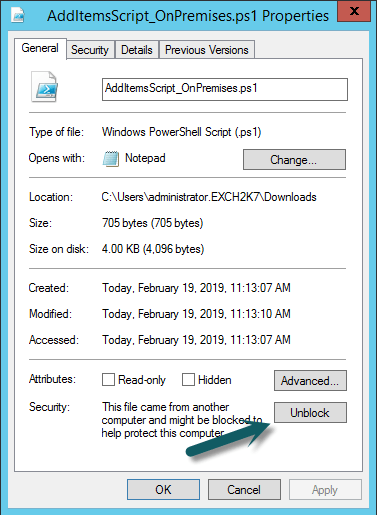
Download AddItemsScript_OnPremises and extract the zip file to find the “AddItems_OnPremises.ps1” script from the package. Right click on the file (AddItemsScript_OnPremises.ps1) –> Properties –> unblock the file if it is blocked as shown below:
Step 2
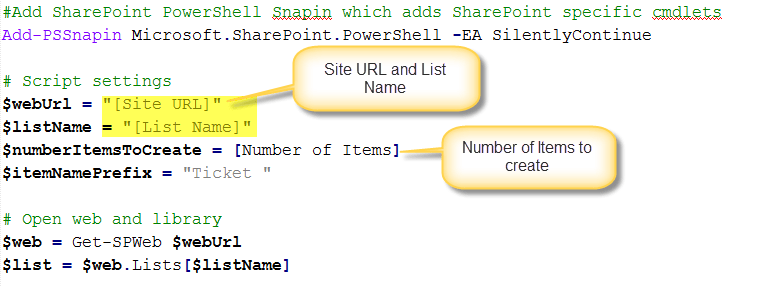
Edit the script using notepad and replace the [Site URL], [List Name] and [Number of Items] with actual values as shown below:
Step 3
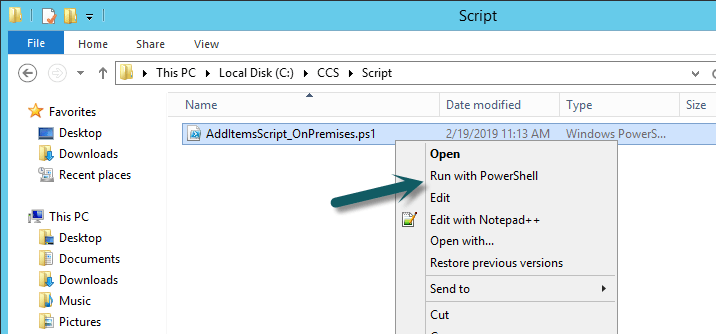
Right Click on the script file –> click on “Run with PowerShell” as shown below
SharePoint list items creation starts and log comes as shown below. Once the items creation is complete, PowerShell window will be closed automatically.

To delete these temporary items, refer this article.


