Applies To: SharePoint On-Premises
Note: This setup process is for NITRO Studio Azure version. Please refer this link for setting up secure version of NITRO Studio.
Description
This article describes the steps to install the Crow Canyon NITRO Studio for SharePoint On-Premises (2013 / 2016 / 2019).
Prerequisites
- SharePoint should be installed and configured (SharePoint 2013/2016/2019) and server should be in stable state
- Go to SharePoint Central Admin –> System Settings –> Manage Servers in the farm. All the SharePoint servers in the farm should be in state “No Action Required” or “Upgrade Available”
- Logged-in user should be a domain user, local admin and a member of Farm Administrators group in SharePoint
- Logged-in user should have owner rights on SharePoint Admin content database, SharePoint configuration database and target web application’s content database
- SharePoint Timer Service and SharePoint Administration services should be in running state
- If SharePoint farm has multiple servers, these services should be in running state in all the SharePoint servers
- Execute pending Admin Jobs before starting setup, please follow below instructions:
- Stop SharePoint Timer Service and SharePoint Administration services in SharePoint server
- Run administrator command prompt from SharePoint server, change the directory to SharePoint hive location
- SharePoint 2013:
C:\Program Files\Common Files\Microsoft Shared\Web Server Extensions\15\BIN - SharePoint 2016/SharePoint 2019:
C:\Program Files\Common Files\Microsoft Shared\Web Server Extensions\16\BIN
- SharePoint 2013:
- Run below command
STSADM.EXE -o execadmsvcjobs- Expected Output: It will show executing message for any pending admin jobs and shows “Operations completed successfully” message at the end
- Start SharePoint Timer Service and SharePoint Administration Services
- If SharePoint farm has multiple servers, repeat the same steps in all the servers in the farm
- Ensure that following URLs and IP Addresses are accessible from SharePoint server(s):
- URLs: https://nitrostudio.azurewebsites.net, https://ccsportal.azurewebsites.net
- IP Addresses: 104.44.128.14, 104.44.128.15, 104.44.128.16, 104.44.128.17, 104.214.52.79, 13.65.212.252, 13.66.37.235, 13.66.36.172, 13.84.40.155, 13.66.37.11, 40.84.136.198, 23.98.144.222, 23.98.128.142, 40.124.36.136 (these IPs are from Microsoft Azure datacenters where Crow Canyon services are hosted)
Package Information:
| SharePoint Version | Package Name (Please contact Crow Canyon for package) |
| SharePoint 2013 | NITRO_SP2013.zip |
| SharePoint 2016/SharePoint 2019 | NITRO_SP2016_SP2019.zip |
Package contains SharePoint solution files (.wsp) and Power Shell scripts (.ps1).
Solutions
- CrowCanyon.NitroStudio.wsp
- CrowCanyon.CommonUtils.wsp
- CrowCanyon.WorkflowManager.wsp
PowerShell Scripts
- NITRO_Install.ps1
- NITRO_ActivateFeatures.ps1
Summary of steps
- Prepare the solutions
- Add and deploy the solutions in the SharePoint Server
- Activate features in site collection
- Activate NITRO for a site
- Create Portal Site (Optional)
- Register License
- Install NITRO Workflow debugging service
- Install NITRO Office API for document generation
Detailed Steps
1. Prepare the solutions
Copy the downloaded zip file to the SharePoint Server.
Note: If there are multiple SharePoint servers in the farm, copy the zip file to one of the servers in the SharePoint farm that is running “Microsoft SharePoint Foundation Web Application” service.
Open Command Prompt (Run as Administrator) –> navigate to the Package location –> enter the below command to verify MD5 signature for the package.
SP 2013: CertUtil -hashfile NITRO_SP2013.zip MD5
SP 2016/SP 2019: CertUtil -hashfile NITRO_SP2016_SP2019.zip MD5
In this example, package download link is like “https://…/MD5_de609b2210c24edd9d40b691613a7574/NITROStudioSetup.zip” and the command output is matching with checksum in the download link as expected. Please contact sharepointsupport@crowcanyon.com if this checksum is not matching.
Note: MD5 signature is to be verified for the downloaded ‘NITRO_SP2013.zip/NITRO_SP2016_SP2019.zip’ file and not the extracted files from it.
After MD5 signature is validated, right click on zip file and extract the files from *.zip file that contains Crow Canyon solutions (*.wsp) along with two PowerShell scripts (*.ps1) and copy them to the SharePoint server
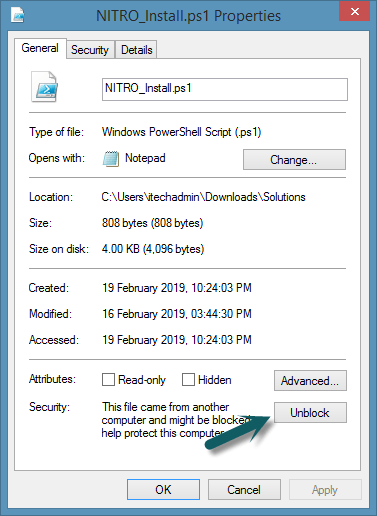
Note: It is possible that the extracted files are blocked as they are downloaded from internet. To unblock the files, Right click on each file –> Properties –> Unblock the file as shown below:
2. Add and deploy the solutions in the SharePoint server
Note:
- There will be a downtime of 2-3 minutes in the SharePoint Server during the solutions deployment
- If the solutions are already installed in the SharePoint server then those solutions will be upgraded
- To add and deploy the Crow Canyon solutions in the SharePoint Server, open SharePoint Management Shell (run as administrator) and change the directory to the NITRO install package:

- Type “
.\NITRO_Install.ps1” and hit enter to start solutions installation - Script will prompt for the web application URL to deploy the solutions. Enter the Web application URL and hit enter:

- This will add and deploy all the Crow Canyon solutions (*.wsp) in the SharePoint Server
- Open SharePoint Central Administration –> System Settings –> Farm Management –> Manage farm solutions. Wait until status for all solutions changes to “Deployed”

After the solutions were successfully deployed in SharePoint server, go to Services.msc –> restart ‘SharePoint Timer Service’ in all SharePoint servers
Solution Description
| S. No. | Solution Name | Deployment Scope | Description | Feature Scope |
| 1 | crowcanyon.commonutils.wsp | Global | This solution has common functionality used by various NITRO components:
|
Crow Canyon Forms Attachments – Site Crow Canyon Mail Templates Administration – Site Collection |
| 2 | crowcanyon.nitrostudio.wsp | Web Application |
Except for Workflow Manager, all NITRO components run on client side. That is, NITRO code runs in browser in context of the logged-in user. NITRO Studio solution is only used to install these client-side components in the site where NITRO is activated. This is done from pages listed below:
Note that NITRO Studio solution is not used by NITRO components running in site for their functionality. It is only used for operations triggered by users from NITRO Studio pages. |
Site Collection |
| 3 | crowcanyon.workflowmanager.wsp | Web Application |
This solution has server side code to handle SharePoint list item events like item added/updated/deleted. It also creates a timer job in SharePoint for workflows that run as per a schedule or a date/time. This component is used to implement business process flows in SharePoint. |
Site Collection |
- To use NITRO in other web applications, go to Solution Management –> click on “crowcanyon.workflowmanager.wsp” solution –> Deploy to the required web application(s)
Note: In case of any errors during the solution deployment, please refer “Troubleshooting steps in case above process does not work” section from https://www.crowcanyon.help/article/311/.
- Run “NITRO_ActivateFeatures.ps1” from the SharePoint Management Shell to activate the NITRO features in the required site. Enter “
.\NITRO_ActivateFeatures.ps1” and hit enter to start activating the NITRO features. Script will prompt for site collection URL, enter the target site collection URL and hit enter:

Output: Success message will be shown in the PowerShell as “Crow Canyon NITRO Features activation is completed”:

- Go to the site collection where NITRO is activated and click the gear icon (cog) in the top right corner:
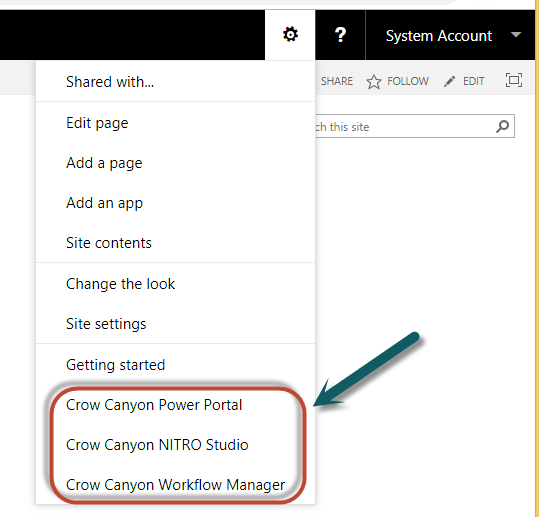
- Click Crow Canyon NITRO Studio to navigate to the NITRO Studio Admin page. This page lists all the sub-sites in the site collection:
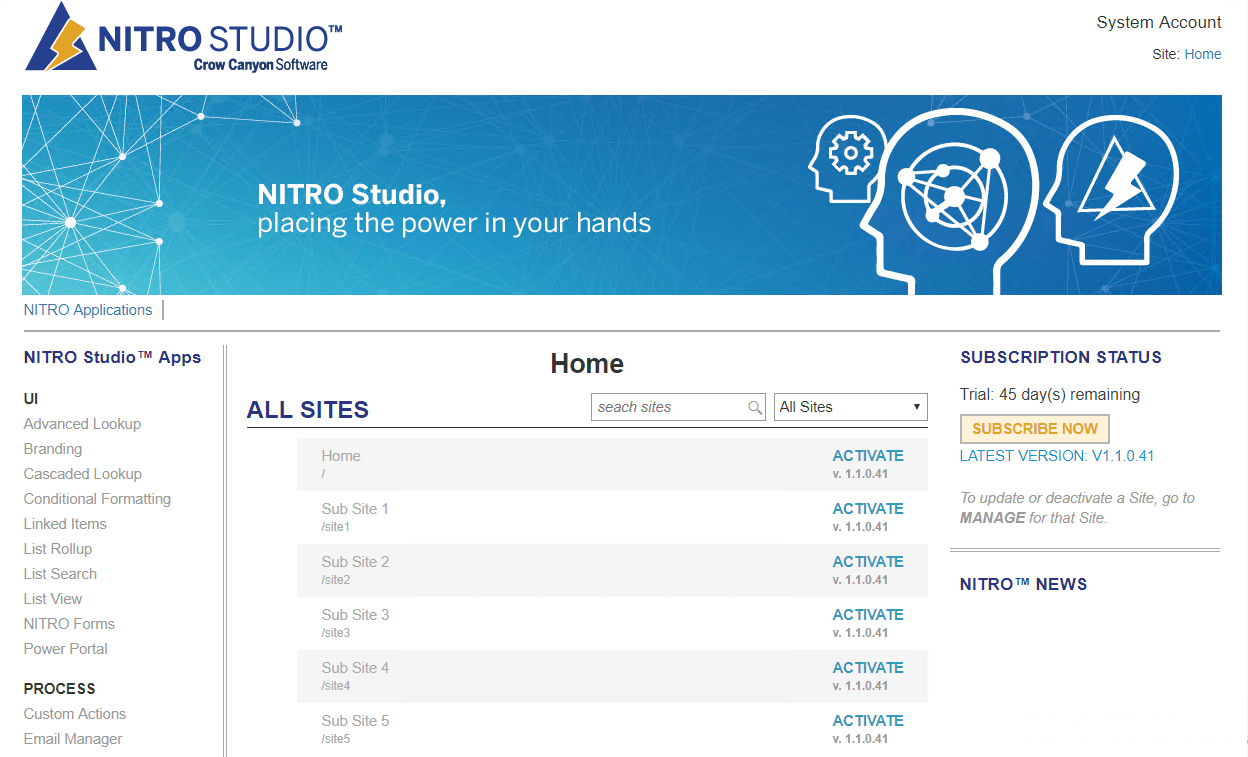
- To activate NITRO Studio for a site, click “Activate” link for the corresponding site:
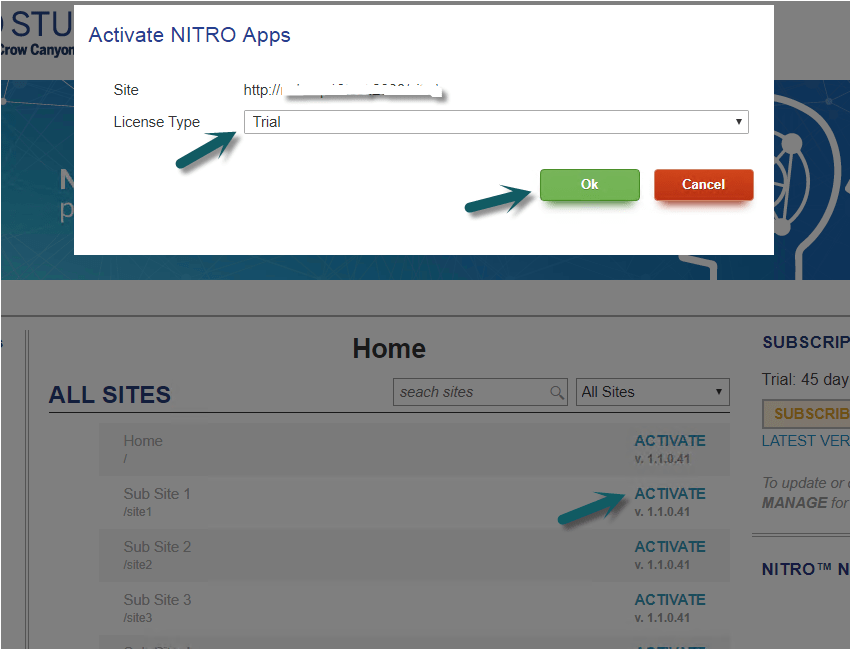
- Activation process will being and show the progress:
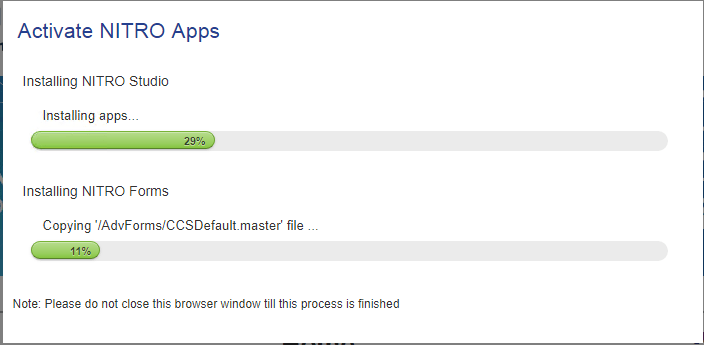
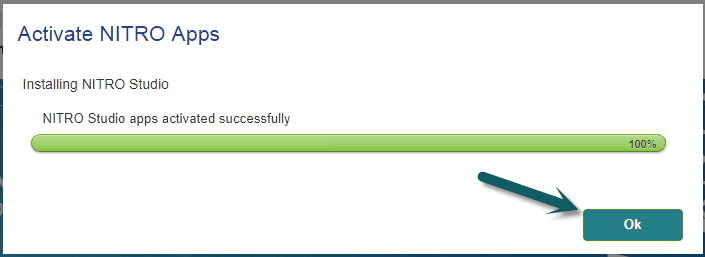
- Wait until success message appears and then click on Ok:
- Go to Site Collection –> Site settings –> Site Collection Administration –> Site collection features and ensure that below site collection features are activated:

- With the above steps, NITRO will get activated on the site. Refer https://www.crowcanyon.info/nitro/appmanual_v2/ for user manual of NITRO Apps
5. Create Portal Site (Optional)
- In order to create portal site, navigate to the site collection and click gear icon (cog) in the top right corner:

- Click Crow Canyon Power Portal and click New Portal site as shown below:

- Provide the Portal site URL, title and select the license and click on Ok:

- Wait until success message appears as shown below and then click Ok
- Please refer https://www.crowcanyon.info/nitro/appmanual_v2/index.html?portal-settings.html to configure the portal
6. Register License
- By default the NITRO studio comes with 45 days trial license. To get the subscription farm licenses, please send the SharePoint Farm Id to sharepointsupport@crowcanyon.com and we will do the needful. To know the Farm Id of the SharePoint server, open SharePoint Management Shell and type the command as shown belowCommand:
(Get-SPFarm).Id
- If the NITRO Studio is purchased for particular site(s), then along with the SharePoint Farm Id send us the site URL(s) (both NITRO sites and corresponding portal sites if any) and we will register the subscription license for the required site(s).
Please contact sharepointsupport@crowcanyon.com in case of any queries regarding the installation process.
7. Install NITRO Workflow debugging service
This component is common across all NITRO activated site collections in the farm and has to be installed only once. This is an optional component that can be used to debug NITRO workflows. Please refer to this article to install this component in your SharePoint farm.
8. Install NITRO Office API for document generation
This component is common across all NITRO activated site collections in the farm and has to be installed only once. This is an optional component that can be used to generate documents using Office API method in Custom Actions and NITRO workflows. Please refer to this article to install this component in your SharePoint farm.


