Applies To:
SharePoint On-Premises
Note: This setup process is now deprecated. Please refer this link for setting up NITRO Studio.
Description:
This article describes the steps to install the Crow Canyon NITRO solutions for SharePoint On-Premises.
Pre-requisites:
- SharePoint should be installed and configured (SharePoint 2013/2016) and server should be in stable state.
- Go to Central Admin –> System Settings –> Manage Servers in the farm, all the SharePoint servers in the farm should be at “No Action Required” or “Upgrade Available” state.
- Logged in user should be a domain user, local admin and a member of Farm Administrators group in SharePoint.
- Logged in user should have owner rights on SharePoint Admin content database, SharePoint configuration database and target web application’s content database.
- SharePoint Timer Service and SharePoint Administration services should be in running state.
- In case if multiple servers are present in the farm, these services should be in running state in all the SharePoint servers
Package Information:
| SharePoint Version | Package Name (Please contact Crow Canyon for package) |
| SharePoint 2013 | NITRO_SP2013.zip |
| SharePoint 2016 | NITRO_SP2016.zip |
Package contains solution files, Power Shell scripts and license tool:
Solutions:
- CrowCanyon.AdvancedEmail.wsp
- CrowCanyon.AdvancedForms.wsp
- CrowCanyon.AdvancedPrint.wsp
- CrowCanyon.CalculatedTable.wsp
- CrowCanyon.CascadedLookup.wsp
- CrowCanyon.ColorKPI.wsp
- CrowCanyon.CommonUtils.wsp
- CrowCanyon.ConfigurablePortal.wsp
- CrowCanyon.CustomActions.wsp
- CrowCanyon.LicenseManager.wsp
- CrowCanyon.ListSearch.wsp
- CrowCanyon.TaskManager.wsp
- CrowCanyon.WebParts.wsp
- CrowCanyon.WorkflowManager.wsp
- CrowCanyonBranding.wsp
License Tool:
- CrowCanyon.RegisterLicenseKey.exe
PowerShell Scripts:
- NITRO_Install.ps1
- NITRO_ActivateFeatures.ps1
Summary of steps:
- Prepare the solutions
- Add and deploy the solutions in the SharePoint Server
- Activate features
- Register the licenses
- Verify the license keys
Detailed Steps to install the Crow Canyon NITRO solutions in SharePoint server:
- Prepare the solutions
- Extract the files from *.zip file and it contains list of Crow Canyon solutions (*.wsp) along with two PowerShell scripts (NITRO_Install.ps1, NITRO_ActivateFeatures.ps1) to be copied to the SharePoint server.
- In case if there are multiple servers exists in the SharePoint farm, we can copy the solutions to one of the servers that has “Microsoft SharePoint Foundation Web Application” service running.
- Add and deploy the solutions in the SharePoint server
- To add and deploy the Crow Canyon solutions in the SharePoint Server, please open SharePoint Management Shell (run as Administrator) and change the directory to the NITRO install package. See sample screenshot below
- Enter “
.\NITRO_Install.ps1” and hit enter to start solutions installation. - It prompts for the web application URL to deploy the solutions. Please provide the Web application URL and hit enter.
See sample screenshot below
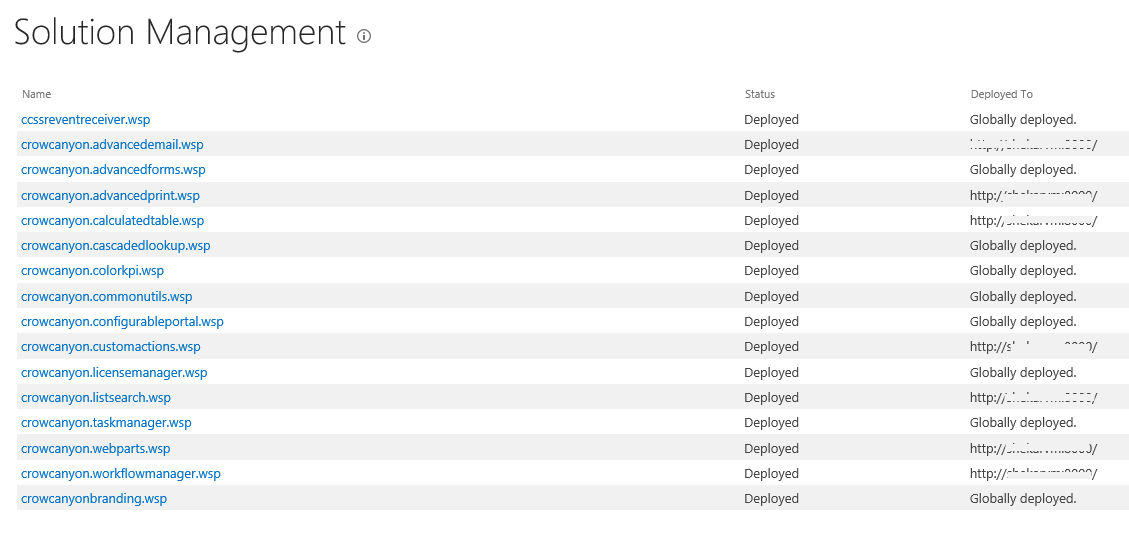
- This will add and deploy all the Crow Canyon solutions (*.wsp) in the SharePoint Server. Open SharePoint Central Administration –> System Settings –> Farm Management –> Manage farm solutions and please wait until all the solutions status changes to “Deployed”.
- If we would like to use the NITRO in other web applications, please go to Solution Management –> click on solution –> deploy to the required web application(s) from below screen.See sample screenshot below
 Note: In case of any errors during the solution deployment, please refer “Troubleshooting steps in case above process does not work:” section from https://www.crowcanyon.help/article/311/
- To add and deploy the Crow Canyon solutions in the SharePoint Server, please open SharePoint Management Shell (run as Administrator) and change the directory to the NITRO install package. See sample screenshot below
- Activate Features
- Run “NITRO_ActivateFeatures.ps1” from the SharePoint Management Shell to activate the NITRO features to the required site. Enter “
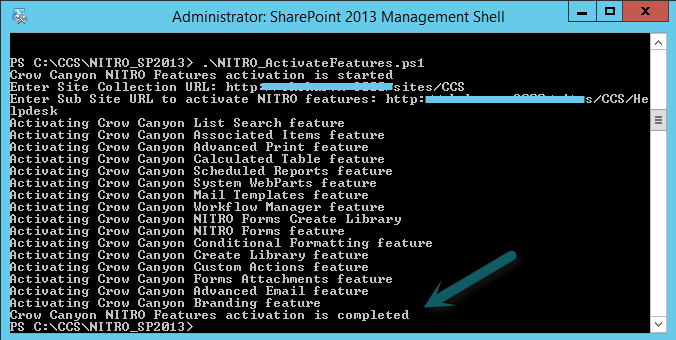
.\NITRO_ActivateFeatures.ps1” and hit enter to start activating the NITRO features. See sample screenshot below
- NITRO Forms, NITRO Custom Actions, Advanced Email, conditional formatting and branding features are web site (sub site) scoped features. Crow Canyon Workflow Manager, List search, Advanced Print, Calculated table, Crow Canyon web parts are site collection scoped features. So, the activate script prompts for both site collection and sub site URL.Provide the target site collection and hit enter (Sample screenshot below).

- It prompts for the web URL (sub site) for which the site level features need to be activated. Provide the site URL and hit enter (Sample screenshot below).

- Output: Success message appears in the PowerShell as “Crow Canyon NITRO Features activation is completed”. See sample screenshot below

- Run “NITRO_ActivateFeatures.ps1” from the SharePoint Management Shell to activate the NITRO features to the required site. Enter “
- Portal Feature
- Please refer “https://www.crowcanyon.info/nitro/appmanual_v2/index.html?power-portal.html” link to understand the portal
- If we would like to configure portal for a site, please create a new sub site under this site, and then activate below sub site scoped features to the newly created portal sub site.
- Crow Canyon Configurable Portal
- Crow Canyon Forms Attachments
- Register the licenses
- Open Central Administration –> site settings –> Manage site features –> activate “Crow Canyon License Manager”. This creates a new link “Crow Canyon License Manager“ in “System Settings” in Central Administration site.
- Open this new “Crow Canyon License Manager” page, and send “Farm ID” to sharepointsupport@crowanyon.com. We will generate the trial licenses and will send you.
- Once the trial licenses are received, go to “Crow Canyon License Manager” page in Central Administration, –> click on “Register” for the below components and insert the corresponding license keys.
- Crow Canyon List Search
- Crow Canyon Associated Items
- Crow Canyon Cascaded Lookup
- Crow Canyon Calculated Table
- Crow Canyon Advanced Print
- Portal License
- Portal is a special case, here we need to register license for every portal instance. Please contact Crow Canyon (sharepointsupport@crowanyon.com) and send the new portal site URL for the license.
See sample screenshot below:

- Verify the license keys
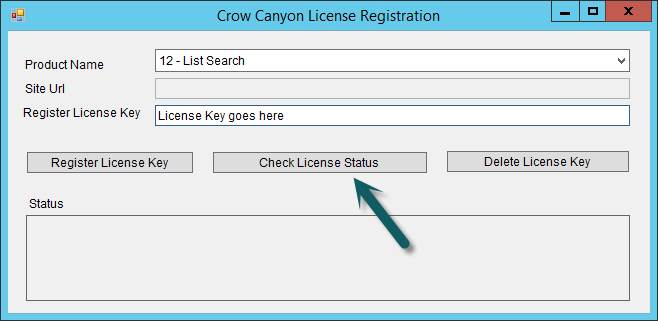
It is mandatory to verify the license key status in all the SharePoint servers in the farm after registering the license keys. Run the “CrowCanyon.RegisterLicenseKey.exe” tool as administrator, select the solution name in the “Product Name” drop down and click “Check License Status”. Repeat this in all the SharePoint servers in the farm.
Sample screenshot below:

Please contact sharepointsupport@crowcanyon.com in case of any queries regarding the installation process.


