Applies to: SharePoint online and On-premises (2013, 2016, 2019 and SE)
Description:
A SharePoint list can have multiple content types. And user can configure different NITRO forms for each content type. A SharePoint list item can be created with one content type and can later be updated to a different content type. To open the item in NITRO form for the updated content type, we need to update a hidden column value in item that stores the NITRO form key. This document describes the multiple content types in SharePoint lists and steps to update content type and form key for an item.
Steps to add content types to SharePoint List
- Go to List settings -> Advanced settings -> select ‘yes’ in Allow management of content types -> click Ok

2. Go to List settings -> In Content types click ‘add from existing site content types’
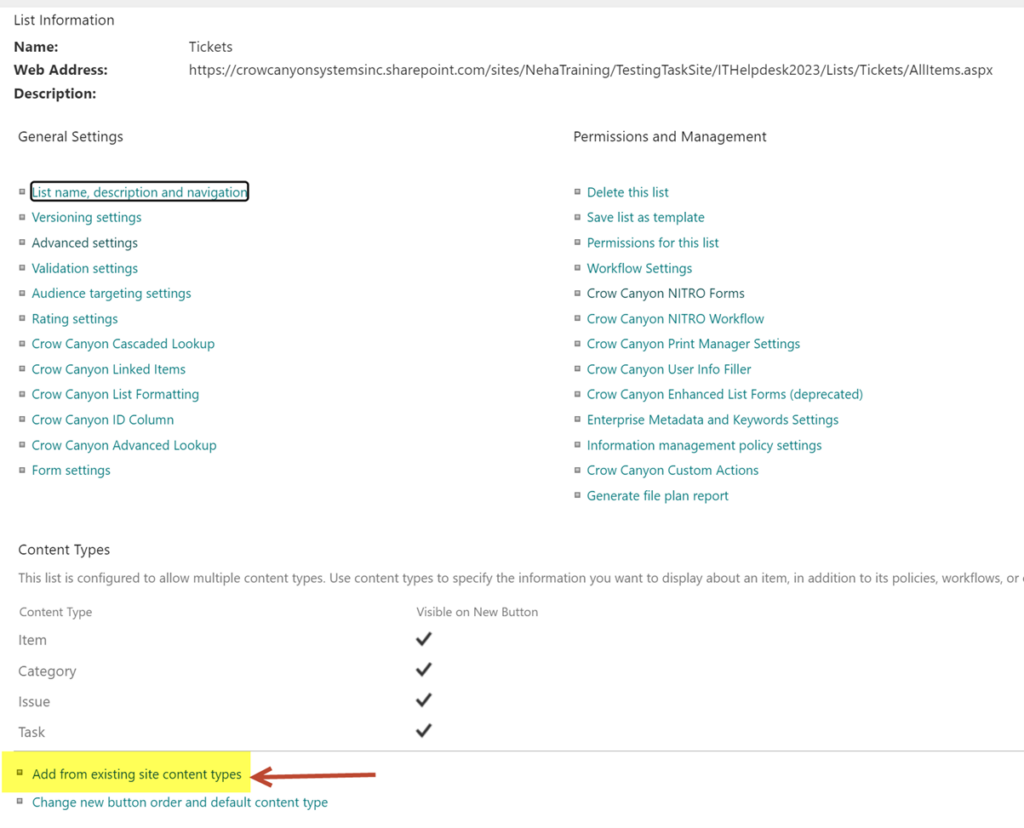
Select content types as shown below:

For example: In ‘Tickets’ list below content types are added

3. Configure a different NITRO form for each content type. To create new form
Go to ‘Manage Forms’ in NITRO Forms ribbon

Click ‘New form’ button

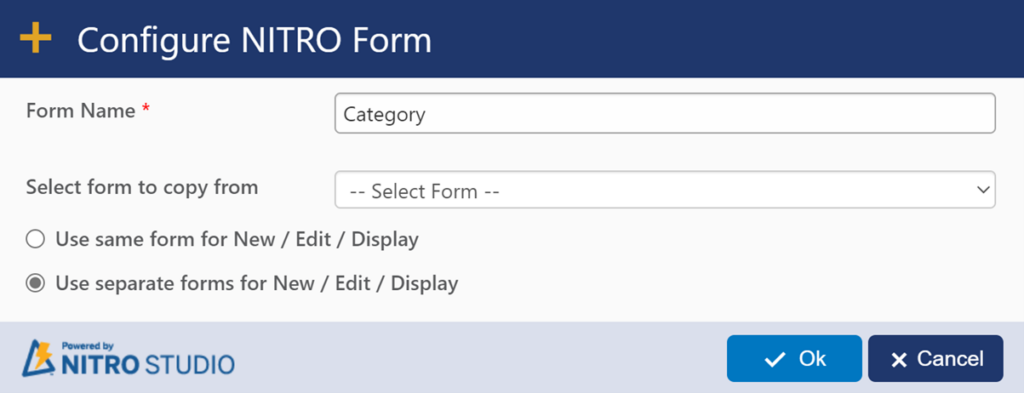
In the ‘Configure NITRO Form’ window:
- Select Form Name
- If you want to copy the new form from an existing form, then select the required form in dropdown.
- Click ‘Ok’
Click ‘Edit’ to configure form setting.


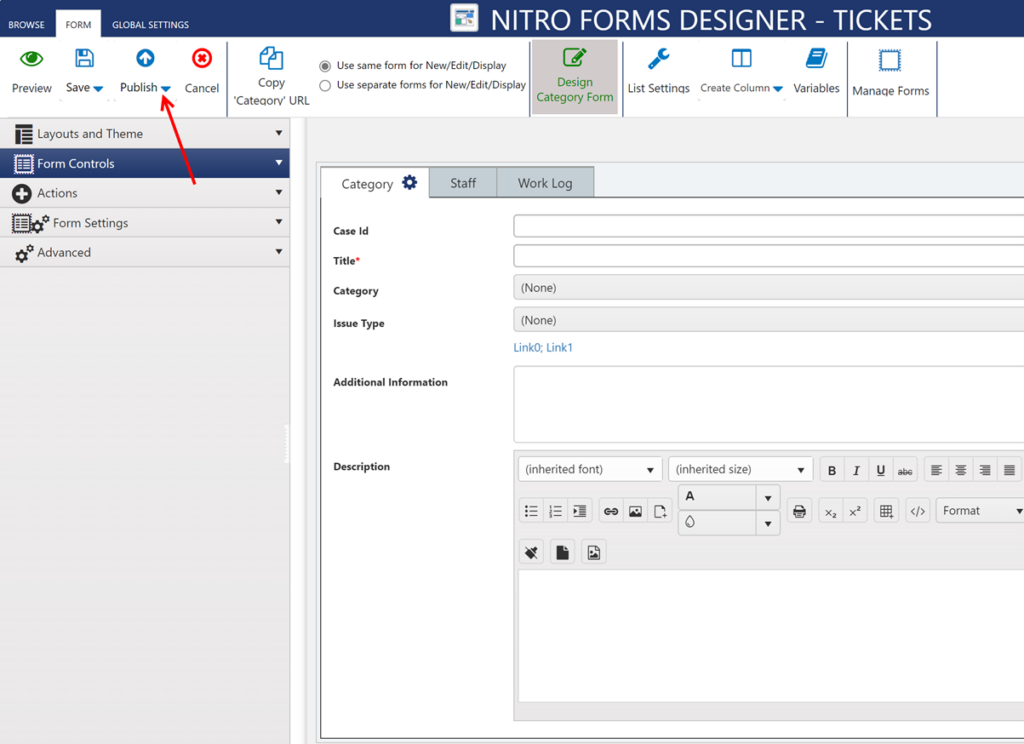
Below images shows NITRO form for ‘Category’ content type in ‘Tickets’ list. Click ‘Publish’ button to publish the form. After configuring NITRO form, bind it with specific content type as described in below step.
4. To bind NITRO form to a specific content type, go to Advanced settings of ‘Manage Forms’ in NITRO Forms ribbon.

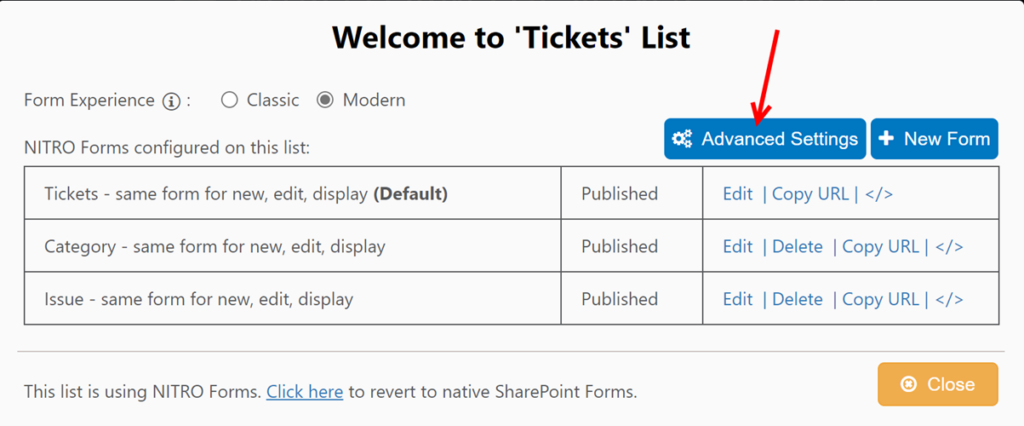
5. Click ‘New Mapping’ in ‘Configure Content Type Mappings’


Click ‘Ok’ to save the settings.
In List, to create items with different content types
Go to list -> ‘New’ button dropdown will show all available content types

Select content type for which you want to create item, NITRO form configured for that content type will open.
To open item with specific form
- Go to Advanced settings of ‘Manage Forms’ in NITRO Forms ribbon.


2. Click ‘New Setting’ in ‘Configure Override Forms’

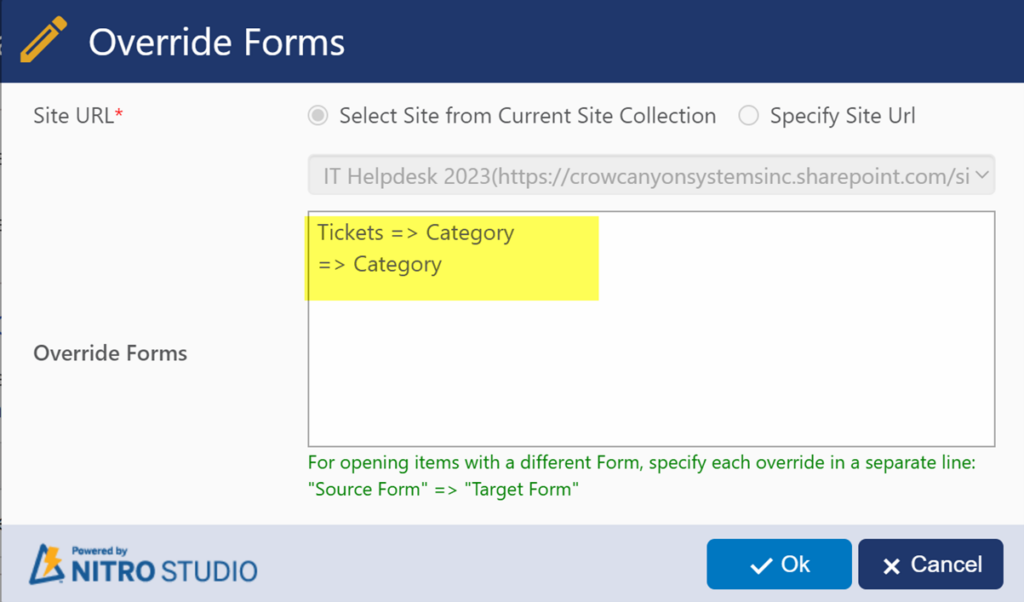
With above override forms setting, items created with ‘Tickets’ form will open with Category form. Similarly, you can configure other override forms settings as per requirement.
Steps to open NITRO form of an item with specific form key
When an item is created using NITRO Forms, the NITOR form name (form key) is saved in a hidden column (‘CCSPortalFormKey’). When an item is opened, this value is used to decide which NITRO form to use to display the item content.
To open an item with a different form, it is required to update item content type along with ‘CCSPortalFormKey’ column value and specify the form key with which we want to open that item.
Below are the steps to update item content type and ‘CCSPortalFormKey’ column value using Crow Canyon Custom Actions.
If item content type is updated for any reason, then ‘CCSPortalFormKey’ value should be updated as well. Below steps explain updating both the content type and the ‘CCSPortalFormKey’ for an item.
Sample List: ‘Tickets’
In this example, we are updating the item content type to ‘Category’ and ‘CCSPortalFormKey’ to ‘Category’ form key.
Navigate to the ‘Tickets’ list à Custom Actions (from list ribbon) à Configure a new action.
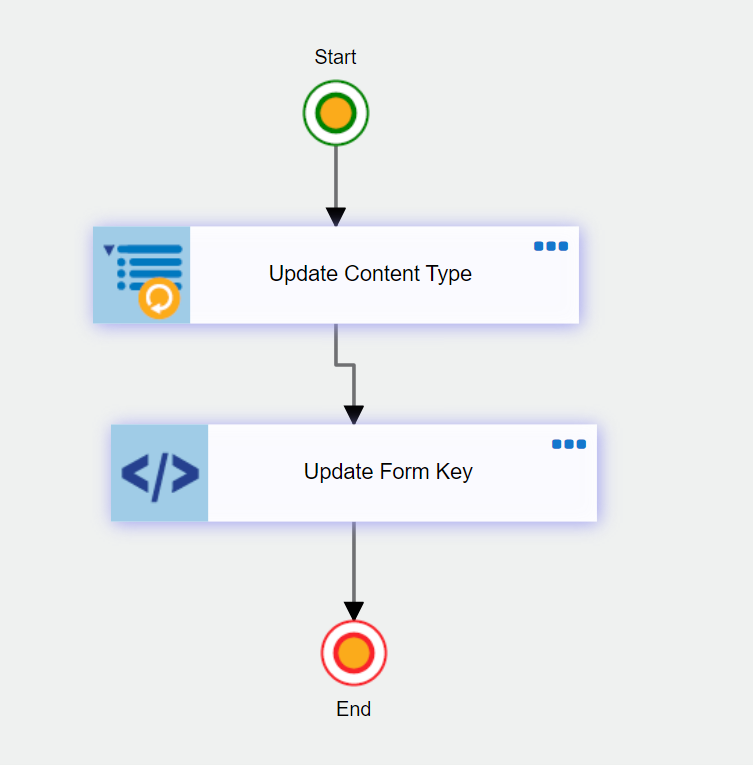
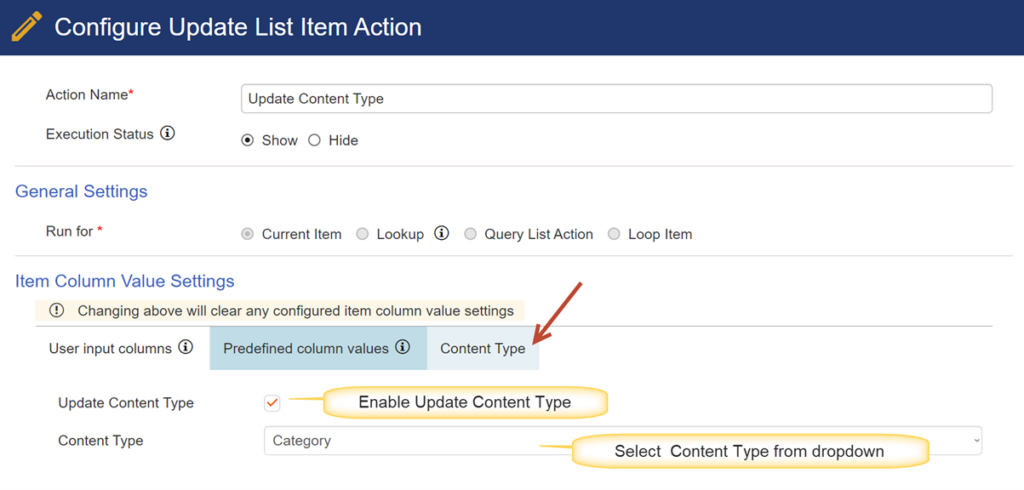
Action 1: Add ‘Update List Item’ action on to the canvas. This action is to update the content type.
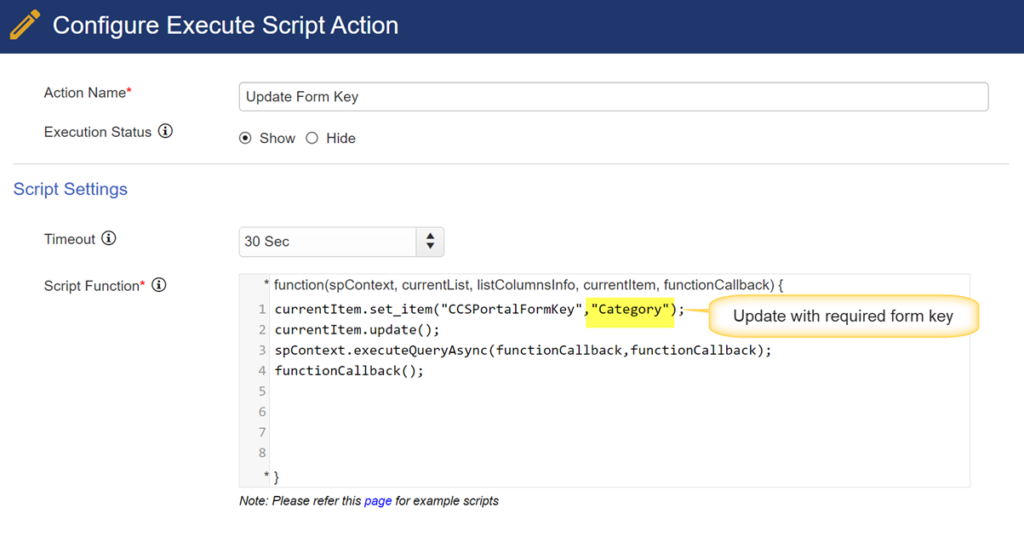
Action 2: Add ‘Execute Script’ action on to the canvas. This action is to update the form key.
Publish the custom action
Script to update form key:
currentItem.set_item(“CCSPortalFormKey”,”Category”);
currentItem.update();
spContext.executeQueryAsync(functionCallback,functionCallback);
functionCallback();
Sample input:
Item has ‘Item’ content type and below NITRO form is configured for ‘Item’ content type.
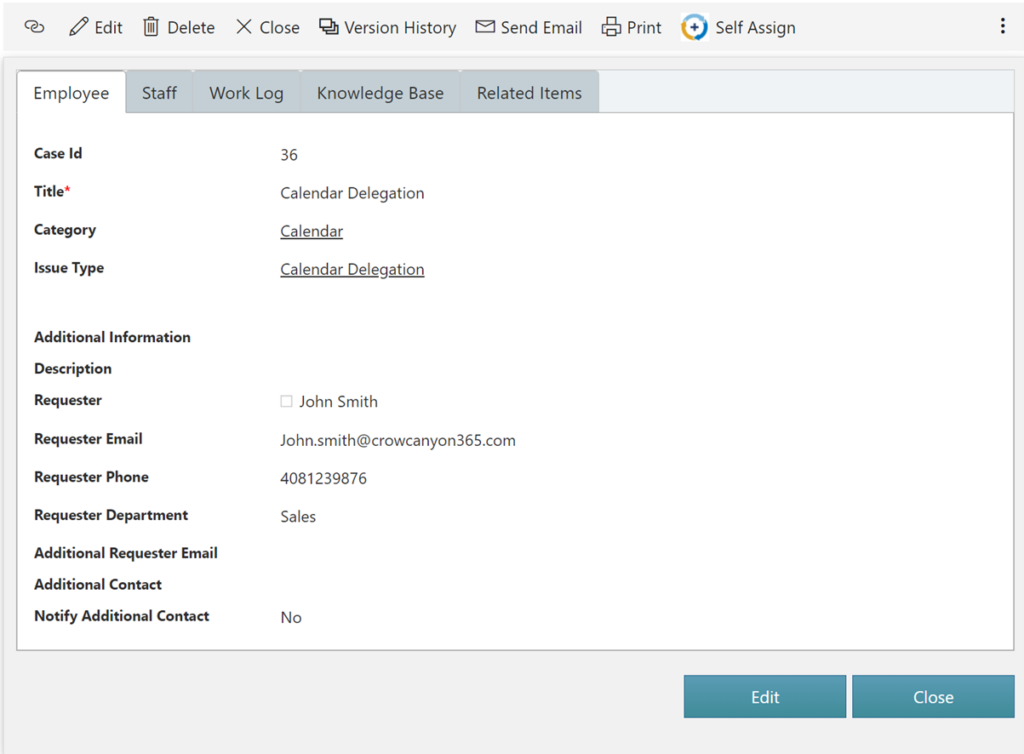
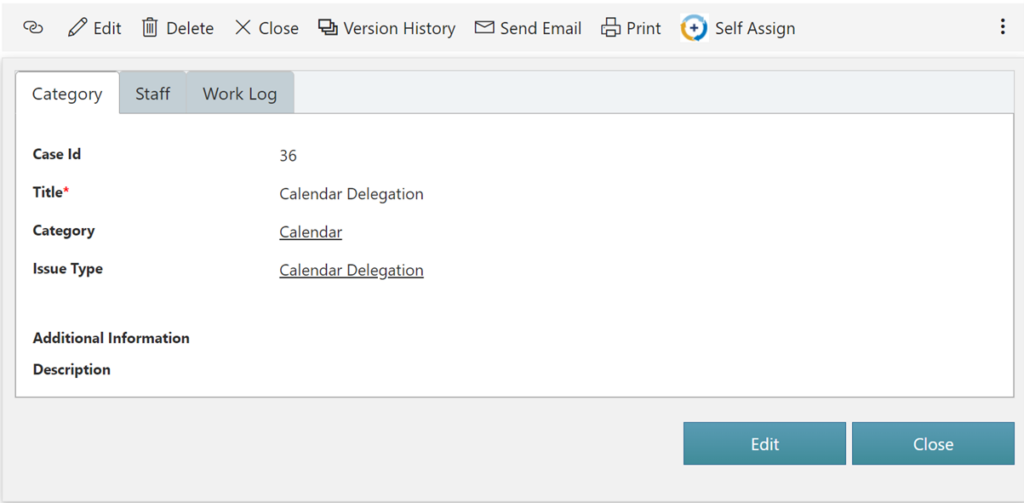
Sample output after executing custom action to update content type to ‘Category’ and open item with ‘Category’ form.
