Applies to:
SharePoint Online
Description
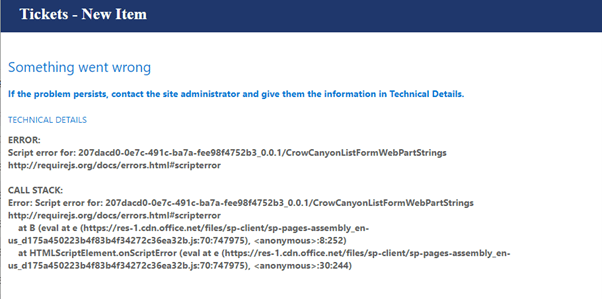
This article has steps to troubleshoot if Crow Canyon SPFx (Modern UI) components do not load and show an error. This issue occurs when these components are updated to a newer version, but the files are referenced from the old version. This can happen if update is not done in all the sites or SharePoint is referring to cached files from older versions.
Example:
Detailed steps
- Update NITRO Modern UI components for all the NITRO activated sites in the SharePoint tenancy. Please note that NITRO activated sites may be there in more than one site collection in your tenancy. Open NITRO Studio home page in each site collection where NITRO is installed and check the NITRO activated sites.
Note: Site collection administrator user can perform this step.
- Navigate to the site –> Site Settings –> Site Administration –> Crow Canyon NITRO Apps –> NITRO ADMIN HOME –> Click ‘Setup’ button (if it is available, else move to next step).

- Install/Upgrade NITRO Modern UI components in the site.
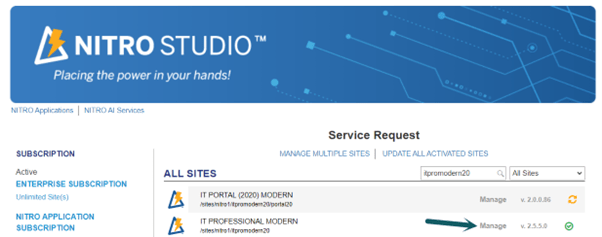
Click ‘Manage’ button for NITRO activated site from NITRO ADMIN HOME page –> Click ‘Upgrade’ (or ‘Install’). Upgrade all NITRO activated sites in the site collection by repeating this step.


- Clear browser cache and cookies.
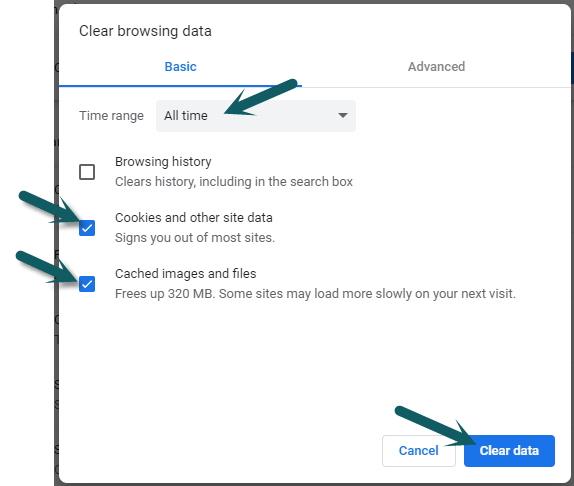
Click ‘Ctrl+Shift+Delete’ and clear the browsing data; cookies and cache. Please note that this has to be done by all users in their browser.
- Sign-in to the SharePoint site.
- Refresh (Ctrl+F5) the page with errors a couple of times and check if the issue is resolved. Please wait for 5-10 seconds and reload if the issue is still there.
- If the issue is not resolved with the above steps.
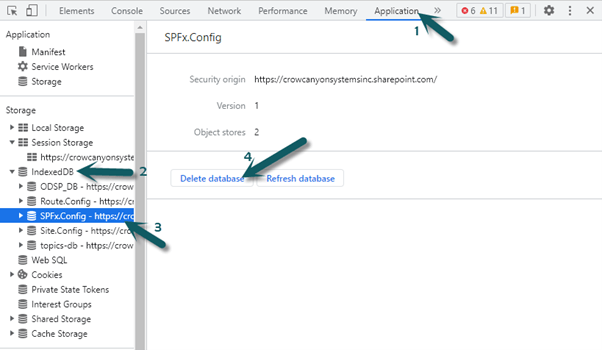
- Open browser developer tools by pressing F12 key –> Application –> Expand ‘IndexedDB’ –> Select SPFx.Config –> Click ‘Delete database’.
- Refresh the page a few times and check if the issue is resolved. This step should be performed by every user who is facing this issue.
- If the issue is still not resolved, remove modern UI components (‘Crow Canyon NITRO Web Parts I’ and ‘Crow Canyon NITRO Web Parts II’) and reinstall:
Note: Site collection administrator user can perform this step.
- All the sites: Go to site contents –> Remove Crow Canyon NITRO Web Parts I and II. Repeat this step for all the sites in the site collection.
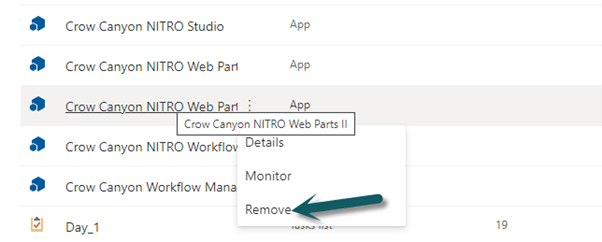
- Site collection (root site): Go to the root site –> Site contents –> Remove ‘Crow Canyon NITRO Web Parts I and II’.
- Recycle bin: Go to site contents of root site –> Recycle bin –> Remove ‘Crow Canyon NITRO Web Parts I and II’.
- Second-stage recycle bin: Scroll to the bottom of Recycle bin –> Click ‘second-stage recycle bin’ –> Remove ‘Crow Canyon NITRO Web Parts I and II’.
- Admin recycle bin: Go to Site settings of the root site –> Site Collection Administration –> Recycle bin –> Remove ‘Crow Canyon NITRO Web Parts I and II’.
- Reinstall ‘Crow Canyon NITRO Web Parts I’ and ‘Crow Canyon NITRO Web Parts II’.
- Go to site contents of the root site –> Crow Canyon NITRO Studio –> Click ‘Manage’ for the site –> Click ‘Install’ button. Repeat this for all NITRO activated subsites.
- Clear browser cache and reload the page couple of times and check the result.

If the issue is still not resolved, please contact Crow Canyon at sharepointsupport@crowcanyon.com

